Showing posts with label interesting fact/tips/FAQ. Show all posts

Tuesday, September 15, 2015

Chocolate Chip Cookies (Salted?)


Who don't like chocolate chip cookies? This recipe create crispy edge and chewy center chocolate chip cookies. However, if you prefer crispier cookies (no chewy center) extend baking time 1 to 2 minutes more than specify in the recipe.

For this recipe, I melted the butter because I forgotten to leave the butter at the room temperature to soften. With this melted butter, I notice that the mixture appear to be slightly wet. I refrigerate the mixture in the refrigerator for 20 minutes before I shape it and baked. If you have extra minutes to spare and forgot to leave the butter out, you can melt butter in microwave and leave it cool at room temperature.

Sorry for the lack of pictures, and Oh! this recipe gave me about 45 pieces of chocolate chip cookies of that size (please see picture above).

Ingredients:-
  • 1 cup (250g) butter, room temperature to soften (I used salted butter)
  • 1 1/2 cups brown sugar (packed)
  • 2 eggs (room tempreture)
  • 2 tsp vanilla extract
  • 3 cups self raising flour
  • 1/3 cup chocolate/ cocoa powder
  • 1/2 tsp salt
  • 2 cups semi sweet (dark) chocolate chip
  • Seasalt to sprinkle if you are after salted chocolate chip cookies
Method:-
  1. Preheat oven at 180 degree Celsius and line tray with baking paper or grease the tray.
  2. Wet ingredients: Cream butter and brown sugar. Add eggs, one at a time and whisk till combine. This will loosen the mixture. Add in vanilla extract and combine. Set aside.
  3. Now, it's time for dry ingredients. In another bowl combine well self raising flour, chocolate powder and salt.  
  4. Add dry ingredients into wet ingredients in 3 additions. Mix well after each additions. 
  5. Once done, add in chocolate chips. I use chocbits that could hold it shapes for baking. Mix well.
  6. I refrigerated the cookie dough for 20 minutes because instead of soften the butter at room temperature, I've melted the butter in microwave.
  7.  After 20 minutes (cookie dough have firmed up), I use tablespoon for size and shape it to round. Place the shaped cookie dough on the baking tray 1 inch apart because the cookie will expand in the oven. 
  8. Bake for 12 - 13 minutes depending on the size of the cookies and your oven. Or I shall say bake until the side is golden. Once ready, remove for the tray from oven let the cookies cool down a bit before carefully remove the cookies to cooling rack. 
TIPS:
  • For Salted Chocolate Chip Cookies sprinkle some seasalt on the shaped cookies dough before you bake it.
  • I find that refrigerated cookie dough did not flatten as much and it appear crispier.

Sunday, June 29, 2014

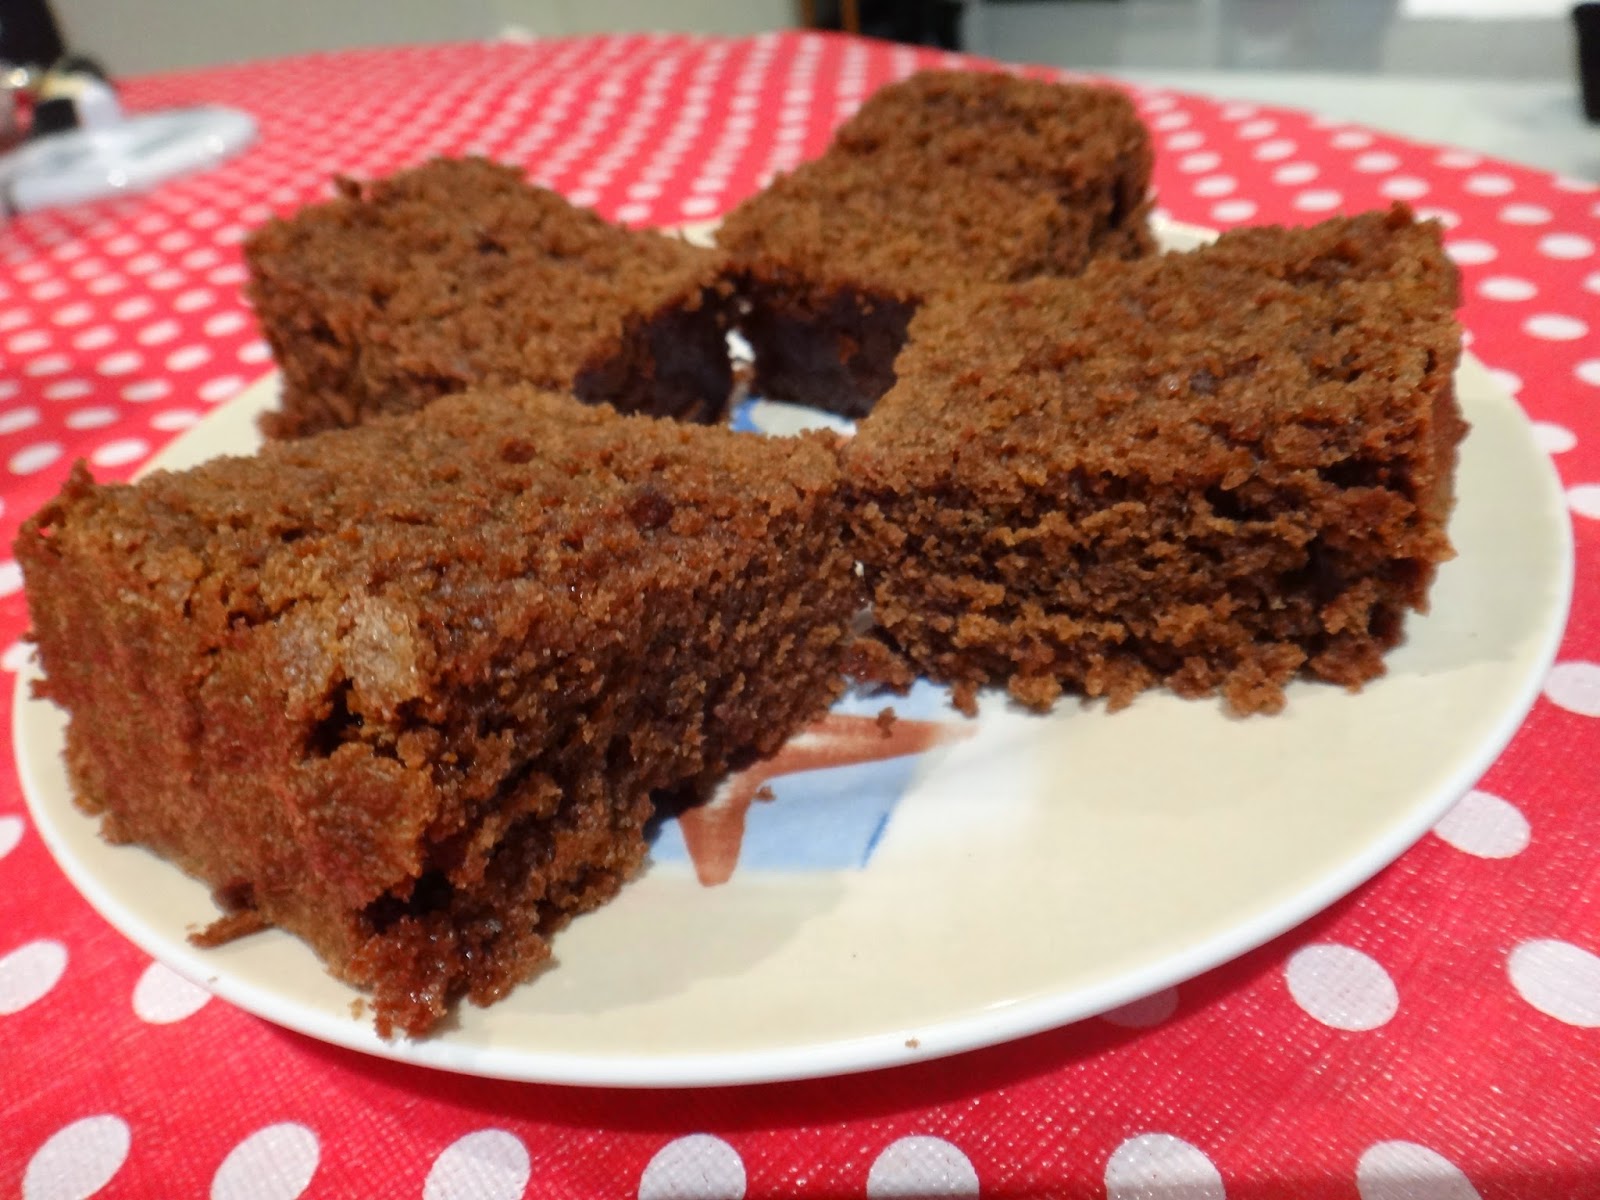
Moist and Light Chocolate Cake (No electric mixer/beater needed !!!)


Who is not into chocolate cake? I am always into chocolate cake but the problem is sometimes I just want to be able to mix the ingredient up with very limited equipment used and stick it into the oven  and eat it. Cadbury kitchen recipe definitely save my day today. Thumbs up to #cadburychocolate #cadburykitchen and I did amend the recipe here and there. For original recipe please click the link above. One last thing this recipe is definitely a keeper.

Ingredients:
  • 1/2 cup water (original recipe call for 1 cup water. I used 1/2 cup water and 1/2 cup milk)
  • 1/2 cup milk
  • 1 1/8 cups caster sugar
  • 125g butter
  • 1/2 cup drinking cocoa powder
  • 1 1/4 cups self raising flour
  • 2 eggs, lightly beaten
  • 1/2 tsp vanilla essence (optional)
  • 1/4 tsp salt
  • 50g chocolate bits (optional)

Methods:
  1. Preheat oven at 180 degree and greased or line cake pan.
  2. Combine water, milk sugar, butter and cocoa in a saucepan and warm but do not boil, stirring until sugar dissolved. Then bring to the boil and simmer gently for 2 minutes. Transfer mixture to a bowl and cool for 30 minutes. To speed up the cooling process you can stick it into fridge. 
  3. Add vanilla essence, salt and chocolate bits and mix well.
  4. Then add SR flour and lightly beaten eggs and mix until just combined. 
  5. Pour into a greased or lined cake pan. Bake in the oven for 40 minutes or until the tester comes out clean. Cool for 10 minutes before moving to wire rack to cool completely.


TIPS
  • Ingredients should be at room temperature for at least 30 minutes
  • Make sure the chocolate mixture is cool properly before you add in flour or eggs otherwise you will need to deal with clumped flour or scrambled eggs.

Saturday, June 28, 2014

Broccoli Beef


This dish may look and sound simply, however, it taste amazing and pack with iron, vitamins, dietary fiber just to name a few.

Ingredients:
  • 300g beef (eye fillet) or any cut if beef you desire, cut into pieces - marinade with 1/2 tbs soy sauce, 1 tsp chinese cooking wine, 1/2 tsp sesame oil, 2 dashes of white pepper, a generous pinch of sugar and 1 tbs corn flour
  • 1 medium size broccoli, cut out the florets and blanch
  • 1 tbs + 1 1/2 tbs oil
  • 1 inch ginger piece, peeled and sliced
  • 1 clove ginger, finely chopped
  • 1 tbs soy sauce
  • 1 tbs oyster sauce
  • 1/4 tsp sesame oil
  • 1/2 tsp sugar
  • 1 tsp corn flour
  • 70ml liquid (water or stock)

Methods:
  1. Marinate the beef for 20 minutes. 
  2. Blanch broccoli floret (see below). Set aside.
  3. For sauce : mixture 1 tbs soy sauce, 1 tbs oyster sauce, 1/4 tsp sesame oil1/2 tsp sugar, tsp corn flour and 70ml liquid.
  4. Heat 1 tbs oil in a wok over high heat. Add in marinated beef and stir fry until it is almost cook (60%  to 70%). Transfer to plate and set aside.
  5. Heat 1 1/2 tbs oil in a wok over high heat (I wipe clean the wok above with paper towel before I add in oil). Add sliced ginger stir fry for 10 seconds and add in finely chopped garlic. Stir fry until aromatic. Add in almost cooked beef into the wok and stir fry until the beef in cook through. Add the blanched broccoli and the sauce mixture. Stir well to combine.
  6. Once the sauce thicken, dish out and serve. Enjoy!!


TIPS:

Blanch: In a medium size pot of water, add a few drops of oil, generous pinch of salt and bring water to boil, . Once the water boiled, carefully add in the broccoli florets for 10 seconds. Remove the florets immediately with strainer to drain excess water .

Sunday, May 18, 2014

Sweet Potato Glutinous Rice Balls (Kuih Buah Melaka Keledek)


Beautiful sunny autumn Sunday perfect for Sweet Potato Glutinous Rice balls. Imagine when you bite into it, the melted palm sugar just burst in your mouth, so yummy. Be careful not to burn your tongue. Don't be dishearten by the name of this dessert. It may look and sound difficult to make, but it is actually quite easy and no machines involve. Just a little bit of patience in kneading.


Ingredients:

400g Sweet Potatoes (orange flesh) - made about 30 balls
200g Glutinous Rice Flour (I bought mine from Asian Grocery)
8 cubes palm sugar (I used pestle to break it into smaller pieces. Knife would work the same)
1 cup Dessicated Coconut
Salt
Oil to grease

Methods:
  1. Peel and cut sweet potatoes to 4 or 5 pieces. Similar size preferred so that they cook at the same time. Put in the steamer and steam until chopstick or skewer easily poke through. Remove the sweet potatoes into a large bowl, mash it and wait till it is warm. 
  2. Mix in glutinous rice flour, a pinch of salt and knead into a dough. I add 100g of G.R Flour start kneading then add  another 50g. As the was dough was still wet I add another 50g to reach the correct consistency. Sweet potatoes contains different amount of water content so I added in the G.R Flour batch by batch.
  3.  I then divided the dough into 4 equal-sized pieces. Using my hand, I gently roll each piece out to form a log about 2cm wide and use a knife to cut 2cm long pieces. This is purely depends on the size of the end product that you like. Before I roll the entire dough I make a few to trial on the sizes.
  4. I lightly floured my hands and roll each piece of dough into a ball. Using my thumb, I created a dent in the center of the ball, place small pieces of palm sugar onto the dent, wrap and roll back into a ball. Repeat with the remaining dough.
  5. Bring a large pot of water to a boil. Carefully place the balls into the pot of boiling water, immediately stir the water so that it doesn't stick to the bottom. Do not overcrowd the pot. I boiled mine in 4 batches. Cook over medium heat until the balls float on the surface, reduce heat and let it simmer for another 5 to 10 minutes depending on the size of the balls. 
  6. While waiting for the balls to float, grease the plate that you would want to transfer the balls to, so that it does not stick to the plate and remember not to stacked them too.They are very sticky. Once the balls are done, drained and placed on the greased plate.
  7. Mix well 1 cup of desiccated coconut with a generous pinch of salt. Roll each ball on the mixture until evenly coated. Then its action time. Nom Nom NOM.


Dough
Dent the center of the ball to place the palm sugar. The dough pieces in this picture is slightly over size to my liking I have then resize it smaller

Sweet potato ball before it goes into the pot


TIPS:

Dough: If the dough is too wet add in more flour n vice versa, until it reaches the correct dough consistency.

Size of the balls: Make sure it is not too small as you will not be able to insert generous amount of palm sugar into it, thus, the bursting of melt palm sugar in your mouth may not happen. However, if it is too big you may not thoroughly cook the ball through (although it floated) and so lead to piece of palm sugar still sitting in the balls.

Saturday, May 17, 2014

Egg Muffin Breakfast 1


Look at the layers


I am a bit tired of my oat breakfast lately so I figured I need bring in some excitement for my breakfast. Therefore, I decided to make egg muffins breakfast today so that I can have it for today and kept it in refrigerator for the rest of the week. Egg muffins are very versatile, you can basically put in anything you want but make sure it is cook through, any topping, amount of salt and pepper to your taste bud. This time around, I used ready make hash brown from Woolworth as the base. I cut it into smaller pieces so that it can fit snugly in the muffin pan. I then top it with diced cup mushroom, wilted baby spinach and rocket,  smoked turkey breast form Deli at Woolworth then pour in whisked egg and top with saute brown onion, some cheese and cayenne pepper.

For an healthier option, of course you can substitute the hash brown with diced boil potatoes. Add some salt into the boiling water so that the boiled potato did not turn out to be bland and swap smoke turkey breast to cook chicken breast pieces. You may scrap potatoes form recipe this together but remember your body need carbohydrate to do it essential functions.

So this is how I make my Egg Muffin Breakfast version 1.

Ingredients:-

3-4 pieces of ready make hash brown cut into pieces (not fried before hand)
3/4 cup of roughly diced cup mushroom
150g spinach and rocket, wilted, cover for 30 seconds in hot water
200g smoke turkey breast, roughly pulled or diced
5 Eggs for 6 cups muffin pan, whisked with a pinch of salt and 1/8 pepper
1/2 medium brown onion, diced and lightly saute with olive oil and a pinch of salt
Cheese enough for toppings (any cheese you desire )
Cayenne pepper, sprinkle
Olive oil to saute the onion and grease the pan


Method:-
1. Preheat over at 180 degree C. Grease muffin pan with olive oil. It has to be grease properly so that removing the breakfast muffin from the pan doesn't turn into a frustrating job. You can line with paper liners too.
2. To assemble the egg muffin, I snugly placed cut hash brown at the based of the muffin cup pan. Then I put in the cup mushroom, wilted baby spinach and rocket and pulled smoked turkey breast. I then pour in whisked egg. Go easy on the salt in the whisked egg because smoke turkey is already slightly salted. Pour up to 3/4 of the muffin cup. Top with lightly sauteed onion, cheese and sprinkle of cayenne pepper.
3. Bake in preheated oven for 20 to 25 minutes or until a toothpick inserted in the middel comes out clean.
4. Serve and enjoy.

Snugly placed potatoes pieces. Clearly Mr. Husband not sure where to focus

Waiting for whisked eggs to fill in. One side already have the sauteed. Will top the other side with sauteed onion after the egg pouring

Filled. The far end cups were top with saute onions after the eggs pouring

Overflowed eggs - mental note: should shake it so that it is evenly distributed


Tips:

Saute the onion : Diced half a brown onion. Heat a teaspoon of olive oil at medium heat, sprinkle a pinch of salt and lightly saute the diced onion until fragrant. See a side to cool.

Onion topping:I prefer to top sauteed onion one the whisked egg because I am not a fan of 'soggy' onion. I enjoy the caramelized bit of the onions.

Egg: Filled up to 3/4 only and give it a little  shake so that it is distributed evenly.

Leftovers: Leftover can be saved in the refrigerator for throughout the week for breakfast

Colours: Add some red or yellow capsicum or pumpkin for colours.


Happy trying and enjoy !

Saturday, February 25, 2012

The Spice Of Life

It's going to be max 38 degree today. Part of me wants to go out and enjoy the Sun before the arrival of Autumn but another side of me telling myself to stay home and do what ever I need to do. For instance updating this blog. So. here I am. I have been meaning to share the benefits of spices that I often used to enhance the flavour of the food I cooked but due to time constraint the plan has to be postponed.

Spices that I am going to talk about may seen ordinary but they have amazing health benefits. Spice can come in buds such as cloves, bark (cinnamon), roots (ginger), berries (peppercorns), aromatic seeds (cumin) and even stigma of flower (saffron).


1. Chilli Peppers can range from  mild to fiery. For this spice, the hotter the better when it comes to its anti-oxidant properties. Chilli is thought to help prevent and treat diabetes and cardiovascular disease. Capsaicin and dihydrocapsaicin have the potential to lower glucose and insulin level and reduce the formation of fatty plaques on the artery walls and prevent blood clots. 15g a day of chilli peppers will be able to improve your sleep which will benefit your cardiovascular system.


2. Ginger: 1g ginger powder per day keeps the nausea away.Ginger may alleviate symptoms of nausea such as morning sickness from pregnancy, surgery or chemotherapy or even motion sickness. It's anti-nausea effects of ginger or ginger tea that are probably the best recognised. Ginger also inhibits inflammation. Patients with arthritic knee pain found relief from ginger extract.


3. Black Pepper: Natural chemical piperine in black pepper is the component that is responsible for possible health benefits. There is suggestive evidence that black pepper can improve digestion, help the nervous system increase energy expenditure.


4. Cinnamon give us warm and fuzzy feeling.  Cinnamon contains health-promoting anti oxidants such as cinnamaldehyde which could help blood flow. The most promising benefit of this spice is that it is able to lower the blood sugar levels.


5. Turmeric usually sold as dry powder. it adds much more colour and flavour to your curries. Abundant in vitamins and minerals, it is the phytochemical curcumin that offers anti-oxidant properties and anti inflammatory. The phenolic compounds in turmeric has shown to reduce the risk of cancer.


6. Cloves are packed with wonderful compound. In fact, cloves have the highest anti-oxidant activity compared with other herbs and spices. Eugenol, the primary component of clove's oil functions as an anti-inflammatory substance. Studies shows that it is able reduce inflammatory symptoms by 15-30 percent. Cloves can be used in both sweet and savoury recipes.

Tuesday, May 24, 2011

DIY Fresh White Breadcrumbs

I have never make my own breadcrumbs before and I have no idea how to make them. However when I was about to make the Scotch Eggs I realised I was short of breadcrumbs and I was too lazy to go out to get breadcrumbs. Luckily, I did have a loaf of white bread at that time and I decided to google if I could find something. To my delight, wikiHow have an article of 'How to make fresh breadcrumbs'.

So here, I am sharing with you the easy method of making breadcrumbs.

In order to make fresh breadcrumbs you will need:
  • slices of bread of your choice
  • Freezer bag or plastic bag or cling wrap
  • Freezer 
  • Bread knife
  • Metal grater
Steps:
  1. Trim of the crust first.
  2. Put the bread slices in freezer bag and put into freezer until frozen.
  3. Remove from freezer. Grate the frozen slices one by one on a metal grater.

Things will be easier if you have blender or food processor because you will only need to pick the bread of your choice remove the crust and pop them into blender or food processor.


Things get harder if you have none of the above. However, worry not because you still can produce your own fresh breadcrumbs by picking bread of you choice (slices). Let it sit on the counter till the bread dried out a bit then take bread knife to cut it into crumbs.Try to cut it as fine as posibble.


TIPS: 4 slices of bread equivalent to 1 cup of breadcrumbs

Saturday, February 26, 2011

Basic Chicken Stock

I love basic stocks. I make one whole pot of stock on the weekend and refrigerate it so that I can gradually use them in my cooking throughout the week. If you have been following my blog you would have realise I am allergy to all sorts of MSG and I am trying to make my food to be tasty in the most non-chemical way.

So, here's the basic chicken stock recipe.

Ingredients:
  • 2kg chicken bones ( I use chicken carcass which only cost me AUD1 for 3)
  • 2 onions or leeks, quartered
  • 2 clove garlic,crushed
  • 2 carrot, peeled and chopped
  • 2 thyme sprigs
  • a dash of white pepper
Steps:
  1. Place all ingredients in a large/deep pot. Cover with cold water and slowly bring to boil on medium heat.
  2. Reduce heat to low and add 1 cup of cold water. Smmer for 3 - 4 hours on medium low heat. \
  3. Skimming fat and scu from surface.
  4. Add extra water if necessary to make sure bones are always covered. 
  5. After 3-4 hours, the liquid should be reduce by half. Strain the pot. Pour into whatever container you desire, allow to cool then freeze what you do not use.
Easy!!!! Trust me!!!

TIPS:
  • Do not allow stock to boil or it will make your stock turn cloudy.
  • If you are too lazy to get any other ingredients listed, make sure you use essential ingredient such as chicken bones, onions and carrots.

Saturday, November 13, 2010

Salt and Chilli Pork Belly with Black Vinegar


I am totally in love with the Pork Belly in Izakaya Den. It just melt in my mouth. Believe it or not, I have never experience melt in my mouth pork belly before I visited Izakaya Den. Since then, I have been busy searching the ways to cook pork belly so that it melts in my mouth and guess what, I found it. I don't know if it same with the Izakaya Den's method but this does melt in my mouth.So, I found out that the secret is 'gently slow-cooking' the meat and salt also helps lift the flavour of produce.

Ingredients:
  • 500g pork belly
  • 1/4 tsp table salt
  • 3/4 cup cooking oil for frying
  • 1/2 cup corn flour
  • 1 tbsp plain flour
  • 1 tbsp table salt
  • 1/2 tsp ground black pepper
  • 1/4 tsp cayenne pepper or chili flakes, add more if you need some kick :)
  • a pinch of five spice powder
      For the vinegar dip
  • 60ml black vinegar
  • 1 tsp fresh ginger, mince
  • 1 1/2 tsp green shallot, mince
  • 1 tbsp fresh coriander, finely chopped
  • juice of fresh lime OR lemon, to taste
Method:-
  1. First of all, sprinkle 1/4 tsp of salt on pork belly and gently steam the pork belly for 3 hours until it is soft and gelatinous. Add more hot water if the steaming water dries up.
  2. To make the vinegar dip, combine all ingredients and mix well.
  3. After 3 hours, move pork belly from steamer and leave it to cool. Once cool, cut the pork into small pieces and set aside. 
  4. Preheat pan of oil.
  5. Combine cornflour, plain flour,  salt, ground black pepper, cayenne pepper and five spice powder in a bowl and mixed well to create a spiced flour. 
  6. Then, toss the cubes of pork belly in the flour mix until well coated, fry until all sides are golden and crispy. Drain on absorbent kitchen paper.
  7. Then, garnish with red chilli and green shallots. Serve with the vinegar dip.

    Friday, October 15, 2010

    Melting Moments

    "Melt In Your Mouth, Not In Your Hand!" That's what I can say about this wonderful flavour cookies and why it melts in your mouth? Because cornflour is added to it :). Melting moments can be presented in few different ways. Since this is my first time baking melting moments I decided to just stick to the basic presentation, which I use teaspoon to measure the amount, form into balls, press with fork (pattern purposes) and top with icing sugar once it is slightly cooled. Alternatively, you can put the dough in piping bag and piped into rosettes or top each cookies with candied cherry for finishing touch or make it into cresent shape and dip the end into chocolate or make a filling and put 2 melting moments together. Since this cookies is more on the fragile side, be very careful when you tranport them. This cookies can be store in airtight container for 2 weeks.

    Make about 36

    Ingredients:-
    • 1 1/2 cup plain flour/all purpose flour
    • 1/2 cup cornflour
    • 1/4 tsp salt
    • 230g butter
    • 1/4 cup + 1 tbsp icing sugar
    • 1 tsp vanilla extract
    • For topping: 1/3 cup icing sugar
    Methods:-
    1. Preheat oven at 180 degree celcius. Line baking trays with baking paper/wax paper.
    2. In a bowl, mix flour, cornflour and salt until well combine.Set aside.
    3. In a large mixing bowl, with an electric mixture, cream butter and sugar until light and fluffy. Add vanilla extract and beat for 1 minute. 
    4. Fold in flour mixture in 2 batches and mix until smooth.
    5. Form into about 1 inch ball (I use teaspoon to measure), place cookies onto prepared baking paper spacing 1 inch a part. Dip fork into 1/3 cup of icing sugar (which is meant for topping) and press on the round cookies. This is to avoid the fork from sticking to the dough. 
    6. Pop into the preheated oven and bake for 10 to 12 minutes or until the edges of the cookies starts to turn brown.
    7. Leave for a few minutes on baking tray before removing to wire rack to cool slightly before sprinkle it with 1/3 cup of icing sugar using fine strainer or sieve. 

    without icing sugar

    with icing sugar

    ready to be eaten

    TIPS:
    • If you decided to pipe rosette dough, keep pipe dough in fridge for 30 minutes before baking so that it will hold the shape

    Friday, October 8, 2010

    Vietnamese Grilled Pork Skewer

    This delicious grilled skewer minced pork and other Vietnamese flavour seasoning. The end result is a firm and nice meat texture with golden brown colour. You can grill them in the barbecue pit (Its barbi time! Why not?) or grill oven or even on frying pan or grill meat pan. Depends on your convenience and suitability. I also make a fish sauce and chili dip to accompany the grill pork.


    Vietnamese Pork Skewer


    Ingredient:-
    • 500g minced pork 
    • 2 tbsp fish sauce
    • 1 1/2 tbsp sugar
    • 1/2 tsp ground white pepper
    •  3 cloves garlic, minced
    • 1/2 tbsp cooking oil
    • 1/8 bicard soda + 1/2 tbsp lemon juice OR 1/2 tsp Baking Powder
    • 1 tbsp water OR 1 1/2 tbsp
    • 1 tbsp roasted rice powder (can get in Asian Grocery or see tip)
    • some cooking oil for palm and grilling pan
    • about 10 wooden skewer (soak in water in 20 minutes)
    Method:-
    1. In a medium mixing bowl or saucepan, add fish sauce, sugar and pepper. Stir the mixture until the sugar almost dissolved.
    2. Then, add in the mince pork, cooking oil and garlic. Use your hand to knead the ingredient until well combine. Alternatively, you could use spoon or spatula to mix and make sure all ingredient are well combine. 
    3. In a small bowl, mix bicard soda with lemon juice and water. If you are using baking powder then just add with water. Stir the mixture. The mixture will foam up. Pour bicarb soda / baking powder mixture into pork mixture. Mix/ knead the ingredient till well combine.
    4. Add roasted rice powder to the mixture and mix/knead the mixture until all are well combined again.
    5. Cover the minced pork mixture and refrigerate for at least 2 hours.
    6. Form the minced pork mixture into sausage shape and put through the skewers. Rub little amount of cooking oil on palms so that the minced meat does not stick to palms.
    7. Heat up barbecue, grill or pan, brush some oil to the grill or pan and cook. Turning the skewer over when they are golden brown. 


    Fish sauce and Chili Dip
     
    Ingredients:-
    • 2 tbsp warm water
    • 1 tsp sugar
    • 1 tbsp fish sauce
    • 1 clove garlic, finely chopped
    • 2 shallots, finely chopped
    • 1 red chili or to your taste
    • 1/2 tbsp lemon juice or to your taste
    • 2 stalk of coriander, leaves only (optional)
    Method:
    1. Mix warm water, sugar and fish sauce together. Stir until sugar dissolved.
    2. Then, add in garlic, shallot, red chili and lemon juice. Stir till all well combine and serve as dip.


     Tip:
    • Most of my cooking does not require roasted rice powder so instead of buying I decided to make my own roasted rice powder by using raw sticky/glutinous rice. If you don't want to buy any sticky/glutinous rice then may use white rice So, how to make roasted rice powder? First, set wok or skillet medium low heat, then, add rice, stir and shake the wok/skillet until the rice is golden brown. It will take about 10-15 minutes. Stir constantly so that the rice doesn't burn. Let it cool a little before grinding it. You can use coffee grinder, mortar and pester.

    Tuesday, September 28, 2010

    Fish with Salted Vegetable Soup

    This soup is pretty easy to cook. It is a healthy soup because it has vegetables, fish slices, most important of all oil free and msg free.

    Ingredients:-
    • 1/2 cup dried anchovies, rinsed
    • 2 dried scallop, rinsed (optional)
    • 1/2 bulb garlic, remove papery skin
    • 1 litre water
    • 350g sliced fish (rinsed, sliced to 1cm thick, soak in a salted water for at least 20 minutes)
    • 300g packed pickled Green Mustard or Salted Vegetable, remove from stem
    • 2 tomatoes, quartered
    • some lettuce or other leafy vegetables (optional)
    • Salt 
    • Ground white pepper to taste
    • 1 stalk spring onion, sliced 
    • 1 stalk coriander
    Methods:
    1. Add dried anchovies, dried scallop and garlic into a big pot filled with water. Cover. Bring to boil then lower heat and simmer for 45 minutes. Discard the dried anchovies, dried scallop and garlic when the soup base is ready.
    2. Meanwhile, soak fish in salted water and prepare the rest of the ingredients.
    3. About 40 minutes before serving, bring the ready soup base to boil. Add the salted vegetable and simmer for 15 minutes, covered. 
    4. Then add the drained fish slices in and briefly stir. Bring to boil. Add tomatoes, stir and bring to boil. Turn off heat and add in lettuce. Make sure it is covered by the soup. Add salt and pepper to taste.
    5. Garnish with spring onion and coriander before serving.

    TIPS:
    • Why soak fish piece in salted water: To reduce the fishy smell and make the fish meat stronger so that it doesn't break ups during the cooking process

    Thursday, September 23, 2010

    Black Forest Trifle

    CookBook Challenge Week 46: Cup

    Trifle consist of layer of cake which should be at the bottom of a trifle, followed by alcohol, fruit, jam/puree/sauce, custard, whipped cream and decorations. You are free to create your own trifle, use whatever cake, fruit, jam and cream around you. There's not specific requirement for the type of cake you use, alcohol, type of fruits, jam/puree/sauce, custard, whipped cream and decorations.

    Let's start with types of cake that can be used. Commonly, (1) cakes that are use for the bottom layer are sponge cake, pound cake, ladyfingers, macaroons, genoise or even crushed biscuits. If you would like to have thicker layer bottom, feel free to sandwich two pieces of cake with jam or puree. Once the bottom layer is put in the bowl/glass, pour in (2) spirit or sprinkle over the cake. This layer is totally optional. The amount of spirit is depend on how strong you want it to be. If you would love to add generous amount of spirit make sure the cake you use are able to absorb that amount, usually, few days old cake may do the trick. Commonly used alcohol are sherry, rum, white wine or liqueurs. (3) The fruit layer. You can use cut up fresh or canned fruits stone fruits preferably. If you don't feel or don't have any of them, no worries, leave them out and jump to (4) jam/puree/sauce of strawberry, raspberry, blackberry, etc or combination of these. Next (5) the custard layer or alternatively pastry cream. I replaces custard layer and the alternative altogether with whipped cream. Besides whipped cream, you can also use lemon curd, mascarpone cheese, lemon juice or chocolate ganache. If you did not use whipped cream for this layer, you have the choice to top it with whipped cream or not. If the size of trifle bowl or glass that you use allows, you may do the second layer of cake, spirit, fruit, jam/puree/sauce, custard layer or cream to fill the bowl.  Keep in mind that the layers are suppose to look uneven or even mix altogether. Finally, (6) decorations for trifles or better known as toppings. You can use whatever you like from fresh or candied  or canned fruits, crushed cookies, nuts, crushed cereal or shave chocolate. Since I use brownies for this particular trifle, I decided to sprinkle crumbed brownies (brownies top) and canned fruit. The assembled trifle is covered and refrigerate for minimum of 8 hours to 24 hours for the flavour to mingle. 
    *Step 3 and 4 can be exchange*

    Though a simple dessert to make,  trifle look gorgeous with its beautiful layer, colours and textures.Although typical trifle is serves in a large deep bowl but I prefer an individual size trifle. It is make in a deep bowl so that all layers are thick. Ideally, bowls should be flat sided than sloping and should be a glass or even better crystal to show of the layers.


    Black Forest Trifle
    The black forest trifle has the same component as black forest cake. I use chocolate brownies instead of chocolate sponge because I still have some left over chocolate brownies. Feel free to buy them from store is you doesn't have the left over or short of time.

    Layers of Black Forest Trifle: chocolate brownies, canned stoneless black cherries, mixed berries puree and whipped cream. Repeat the layers again the topped with crumb brownies, crushed cereal and a cherry.


    Ingredients:-

    (i) Chocolate Brownies.
    • Click here. Leave out the dried fruits if your are looking for plain chocolate brownies. 
    (ii) Canned Stoneless Black Cherries in syrup
    • 415g or more
      (iii) Mixed Berries Puree/sauce - will make approximately 2 cups
      • 500g unsweetened frozen mixed berries
      • 1 cup castor sugar or to taste
      • 1 tbsp cornstarch
      • 1 tsp salt
      • 1/8 tsp vanilla extract
      • 1 1/2 tbsp lemon juice (optional)
      (iv) Whipped Cream
      • 1 1/2 cup thicken cream
      • 1 1/2 tbsp castor sugar
      • 1/4 tsp vanilla extract
       (v) Topping/Garnish
      • Crumbed brownies, crushed cereal and black cherry

      Methods:

      (i) Chocolate Brownies:
      1. Bake chocolate brownies according to directions. Let it cool. 
      2. Cut brownies into desire size to fit into trifle glass or bowl.
      ii) Canned Stoneless Black Cherries in syrup 
      1. Drain the juice
      2. 3/4 of cherries mix in puree and the remaining cherries save for topping or garnish
      (iii) Mixed Berries Puree/Sauce: Make approximately 2 cups
      1. Thaw the frozen mixed berries in a large fine meshed strainer suspended over a medium size saucepan. Once the berries are completely thawed, gently pressing the berries with back of the spoon to force the juice out. All that should remain in the strainer is the mixed berries seeds.
      2. Throw away the seeds. 
      3. To the strained juice, add castor sugar, cornstach, salt, vanilla extract and lemon juice. Stir until smooth. Place saucepan over medium heat. Cook until the sauce thicken. Add more sugar as needed. Remove from heat and add the (ii) drained stoneless black berries. 
      4. Refrigerate for several hours or overnight.
      (iv) Whipped Cream
      1. Whipped the cream until soft peaks form. Add the sugar and vanilla extract, continue to whip until stiff peaks form.
      To Assemble Black Forest Trifle: Place the amount of brownie you need or about a handful if you cut into bite size in the bottom of each trifle individual glass.Next, spoon about 2 tsp of mixed berries puree on the brownies. Then, place 2 - 3 or more cherries which already been mixed into the puree on top. For the next layer, place a large dollop of whipped cream. Repeat the layers starting with brownies. Cover with cling wrap and refrigerate for at least 4 hours to 24 hours to allow the flavour to mingle. Sprinkle some crumbed brownies, crushes cerealn and place a black cherry on top before serving

      Makes about 9 to 10  of   (275ml) glass.


      TIPS:-
      • If you do not have frozen mixed berries or any berries at home for the puree - reserve the syrup of canned stoneless black cherries. Place the syrup in a saucepan along with sugar (1 tbsp or to taste) and simmer until the syrup is syrupy. Remove from heat and add drained black cherries. 
      • If you do not have canned cherries syrup and frozen mixed berries puree - lightly heat up the appropriate amount of mixed berries jam or any jam you have in hand jam for easy spreading. Just skip the whole step of adding fruits to the trifle. However, you may not be able to call this Black Forest Trifle anymore :)
      • What do I do to leftover mixed berries puree : simply pour over ice cream, frozen yogurt or other suitable dessert for quick dessert. Mix into milkshake. Accompaniment for variety of plated dessert. It can also be used to make mixed berries flavour whipped cream.
      • Why use frozen fruit/berries : Frozen fruits/berries is use because it is available year round and at reasonable price. I prefer unsweetened frozen fruits/berries because of the excellent and constant flavour. Frozen fruits/berries can also be kept in the freezer for several months and been use whenever we need them. Their puree can be kept in refrigerator for a week and can also be frozen for several months. 

      Half way thru forcing the juice out
      Almost done!
      This is how canned cherries look like

        LinkWithin

        Related Posts with Thumbnails