Showing posts with label breakfast. Show all posts

Friday, October 16, 2015

Chocolate Mud Cake


This is 
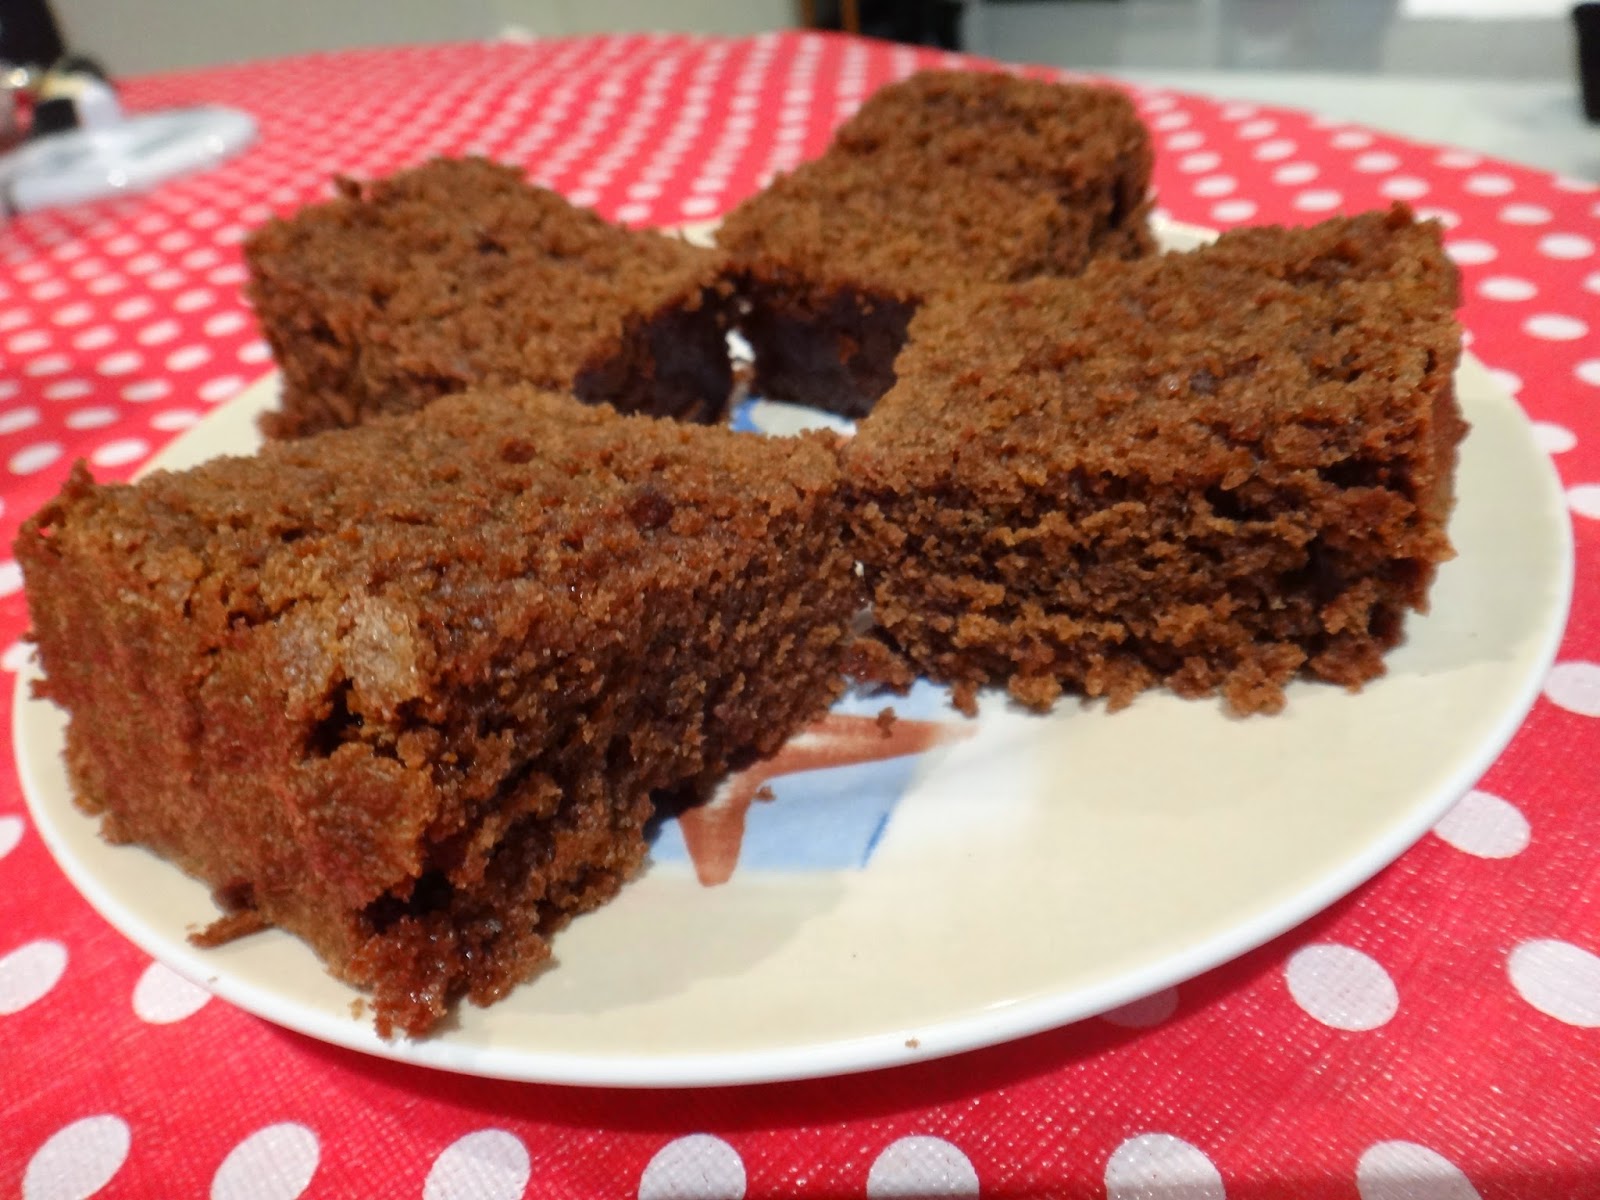
yet another chocolate overloaded recipe. I serve this rich chocolate mud cake  with chocolate butter ganache.

If you are using instant coffee then you will not need 2 tbsp of sugar.


Ingredients:
  • 250g butter, cubed
  • 250g chocolate (semi sweet)
  • 330g granulated sugar
  • 2 tbsp granulated coffee + 2 tbsp sugar + 175ml (3/4cup) hot water
  • 125 ml milk, cold
  • 4 eggs
  • 30ml (2 tbsp) vegetable oil
  • 300g (2 cups) self raising flour
  • 1 tsp salt
  • 55g (1/2 cup) cocoa powder


Method:
  1.  Preheat oven at 150 degree celcius. Grease or line pan with baking paper.
  2. On double boiler (make sure the barely simmering water did not touch the bottom of bowl). Add in butter, chocolate, sugar, and coffee mix. Melt it all. it will take about 5 minutes. Once all melted remove bowl from pot and set aside. Let it cool down for 30 seconds. 
  3. Meanwhile prepare the dry ingredients. Mix together self raising flour, salt and cocoa powder.
  4. Add milk into the chocolate mix to reduce the temperature of the chocolate mixture. Whisk to mix well. I used electric mixer. 
  5. Before you  add in eggs please ensure that the mixture is not too hot otherwise the egg will turn into scramble egg. Add in egg one at a time and mix well. 
  6. Add in vegetable oil and mix well. 
  7. Now its time for dry ingredient. Add dry ingredients you prepared earlier in 3 addition. Combine well.
  8. Pour chocolate mixture mud cake mixture into prepare pan. 
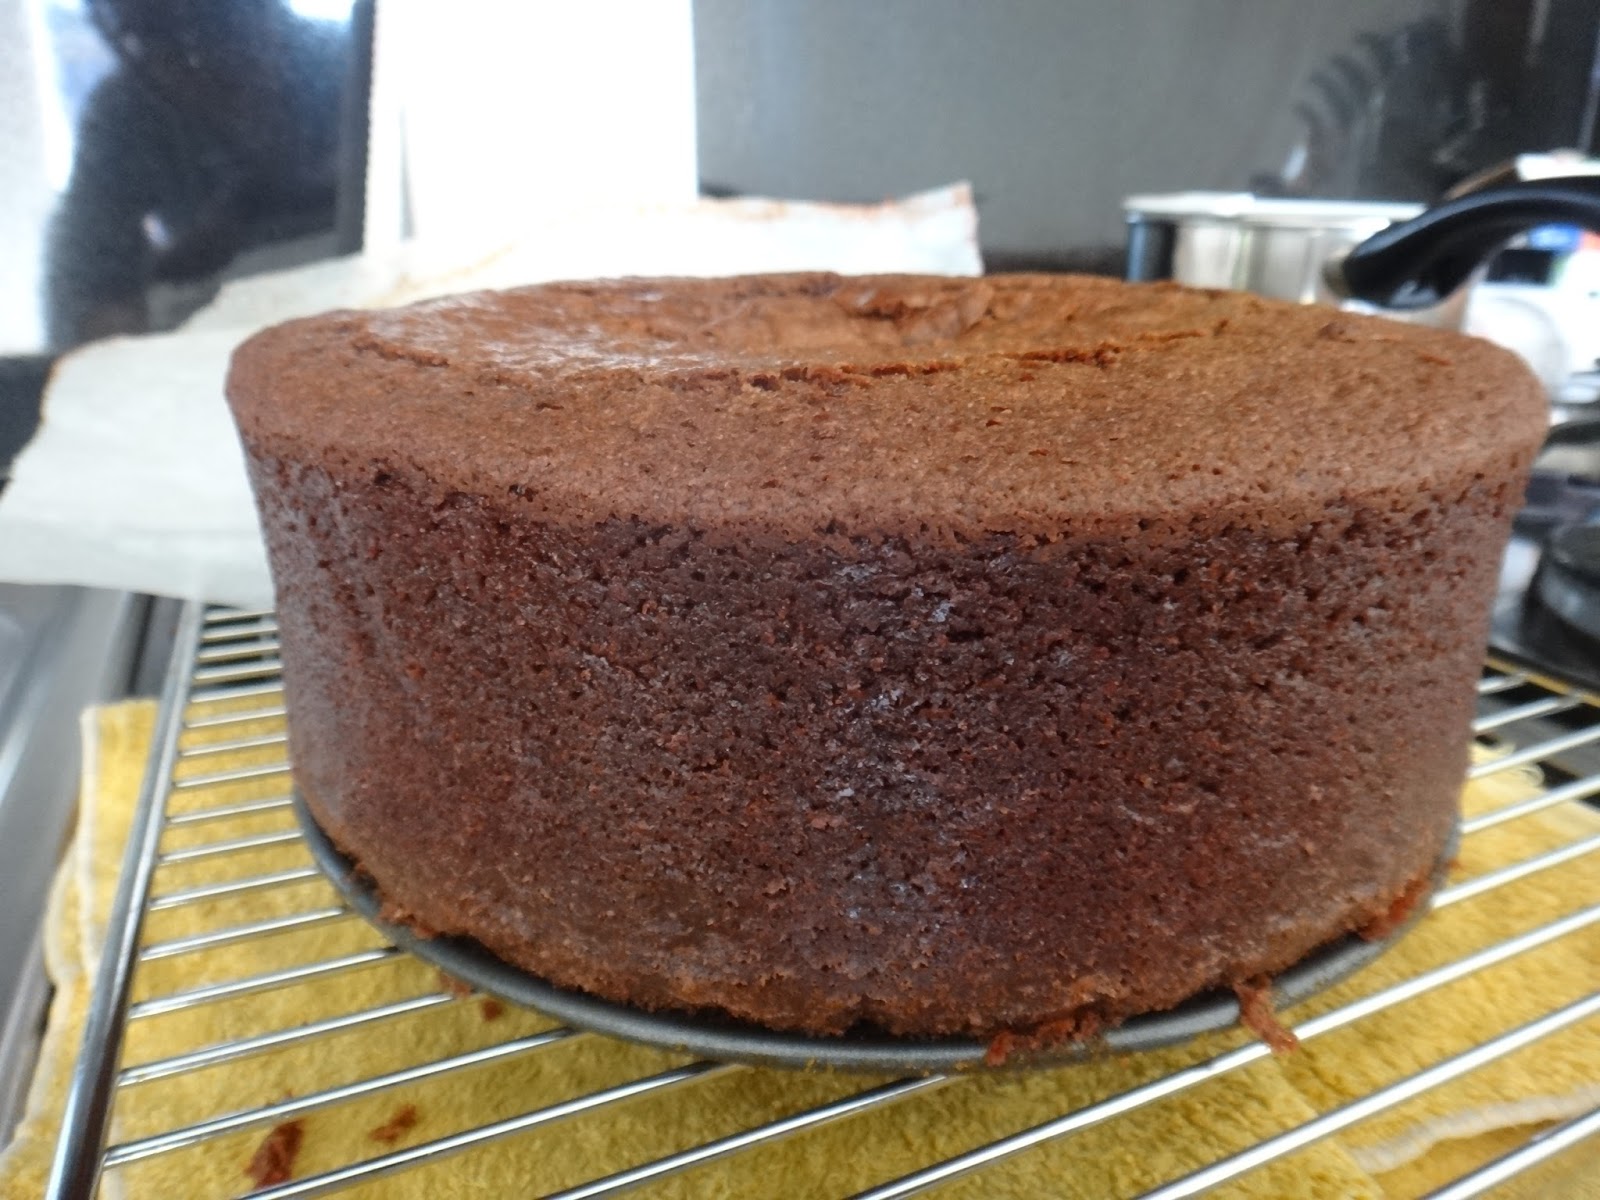
  9. Place in preheated oven at 150 degree Celsius for 2 hours or until the tester comes out clean. Let it cool for 10 to 15 minutes and unmold. Let it cool on the cooling rack. 
  10. Serve just like this or in my case i made dark chocolate butter ganache for the cake.Make sure the cake is completely cool before you pour over the ganache.
Remove the top crust if you want to have even top
Use baking paper to catch the dripping chocolate.

ENJOY!!

    Tuesday, September 15, 2015

    Chocolate Chip Cookies (Salted?)


    Who don't like chocolate chip cookies? This recipe create crispy edge and chewy center chocolate chip cookies. However, if you prefer crispier cookies (no chewy center) extend baking time 1 to 2 minutes more than specify in the recipe.

    For this recipe, I melted the butter because I forgotten to leave the butter at the room temperature to soften. With this melted butter, I notice that the mixture appear to be slightly wet. I refrigerate the mixture in the refrigerator for 20 minutes before I shape it and baked. If you have extra minutes to spare and forgot to leave the butter out, you can melt butter in microwave and leave it cool at room temperature.

    Sorry for the lack of pictures, and Oh! this recipe gave me about 45 pieces of chocolate chip cookies of that size (please see picture above).

    Ingredients:-
    • 1 cup (250g) butter, room temperature to soften (I used salted butter)
    • 1 1/2 cups brown sugar (packed)
    • 2 eggs (room tempreture)
    • 2 tsp vanilla extract
    • 3 cups self raising flour
    • 1/3 cup chocolate/ cocoa powder
    • 1/2 tsp salt
    • 2 cups semi sweet (dark) chocolate chip
    • Seasalt to sprinkle if you are after salted chocolate chip cookies
    Method:-
    1. Preheat oven at 180 degree Celsius and line tray with baking paper or grease the tray.
    2. Wet ingredients: Cream butter and brown sugar. Add eggs, one at a time and whisk till combine. This will loosen the mixture. Add in vanilla extract and combine. Set aside.
    3. Now, it's time for dry ingredients. In another bowl combine well self raising flour, chocolate powder and salt.  
    4. Add dry ingredients into wet ingredients in 3 additions. Mix well after each additions. 
    5. Once done, add in chocolate chips. I use chocbits that could hold it shapes for baking. Mix well.
    6. I refrigerated the cookie dough for 20 minutes because instead of soften the butter at room temperature, I've melted the butter in microwave.
    7.  After 20 minutes (cookie dough have firmed up), I use tablespoon for size and shape it to round. Place the shaped cookie dough on the baking tray 1 inch apart because the cookie will expand in the oven. 
    8. Bake for 12 - 13 minutes depending on the size of the cookies and your oven. Or I shall say bake until the side is golden. Once ready, remove for the tray from oven let the cookies cool down a bit before carefully remove the cookies to cooling rack. 
    TIPS:
    • For Salted Chocolate Chip Cookies sprinkle some seasalt on the shaped cookies dough before you bake it.
    • I find that refrigerated cookie dough did not flatten as much and it appear crispier.

    Wednesday, August 6, 2014

    One Bowl Orange Cake


    One Bowl means minimum wash and at the same time is able to fulfill the cake craving.

    Ingredients:
    • 125g butter
    • 1 1/8 cup caster sugar
    • 2 oranges - get the zest 
    • 1 cup orange juice
    • 1/2 tsp orange essence (optional)
    • 1 1/4 cup self raising flour
    • 2 eggs, lightly beaten
    Method:
    1. Pre heat oven at 180 degree and greased or line cake pan.
    2. Melt butter in the double boiler and add in caster sugar. Once caster sugar incorporated well with the butter, remove the mixing bowl from double boiler.Let it cool down a little to avoid scrambling the eggs.
    3. Add in egg and mix well with orange juice, orange zest and orange essence.
    4. Mix in self raising flour in 2 to 3 addition and mix until just combined.
    5. Pour into prepare cake pan. Bake in the oven for 40 minutes or until the tester comes out clean. Cool for 10 minutes before move it to wire rack to cool.

    Sunday, June 29, 2014

    Moist and Light Chocolate Cake (No electric mixer/beater needed !!!)


    Who is not into chocolate cake? I am always into chocolate cake but the problem is sometimes I just want to be able to mix the ingredient up with very limited equipment used and stick it into the oven  and eat it. Cadbury kitchen recipe definitely save my day today. Thumbs up to #cadburychocolate #cadburykitchen and I did amend the recipe here and there. For original recipe please click the link above. One last thing this recipe is definitely a keeper.

    Ingredients:
    • 1/2 cup water (original recipe call for 1 cup water. I used 1/2 cup water and 1/2 cup milk)
    • 1/2 cup milk
    • 1 1/8 cups caster sugar
    • 125g butter
    • 1/2 cup drinking cocoa powder
    • 1 1/4 cups self raising flour
    • 2 eggs, lightly beaten
    • 1/2 tsp vanilla essence (optional)
    • 1/4 tsp salt
    • 50g chocolate bits (optional)

    Methods:
    1. Preheat oven at 180 degree and greased or line cake pan.
    2. Combine water, milk sugar, butter and cocoa in a saucepan and warm but do not boil, stirring until sugar dissolved. Then bring to the boil and simmer gently for 2 minutes. Transfer mixture to a bowl and cool for 30 minutes. To speed up the cooling process you can stick it into fridge. 
    3. Add vanilla essence, salt and chocolate bits and mix well.
    4. Then add SR flour and lightly beaten eggs and mix until just combined. 
    5. Pour into a greased or lined cake pan. Bake in the oven for 40 minutes or until the tester comes out clean. Cool for 10 minutes before moving to wire rack to cool completely.


    TIPS
    • Ingredients should be at room temperature for at least 30 minutes
    • Make sure the chocolate mixture is cool properly before you add in flour or eggs otherwise you will need to deal with clumped flour or scrambled eggs.

    Sunday, May 18, 2014

    Sweet Potato Glutinous Rice Balls (Kuih Buah Melaka Keledek)


    Beautiful sunny autumn Sunday perfect for Sweet Potato Glutinous Rice balls. Imagine when you bite into it, the melted palm sugar just burst in your mouth, so yummy. Be careful not to burn your tongue. Don't be dishearten by the name of this dessert. It may look and sound difficult to make, but it is actually quite easy and no machines involve. Just a little bit of patience in kneading.


    Ingredients:

    400g Sweet Potatoes (orange flesh) - made about 30 balls
    200g Glutinous Rice Flour (I bought mine from Asian Grocery)
    8 cubes palm sugar (I used pestle to break it into smaller pieces. Knife would work the same)
    1 cup Dessicated Coconut
    Salt
    Oil to grease

    Methods:
    1. Peel and cut sweet potatoes to 4 or 5 pieces. Similar size preferred so that they cook at the same time. Put in the steamer and steam until chopstick or skewer easily poke through. Remove the sweet potatoes into a large bowl, mash it and wait till it is warm. 
    2. Mix in glutinous rice flour, a pinch of salt and knead into a dough. I add 100g of G.R Flour start kneading then add  another 50g. As the was dough was still wet I add another 50g to reach the correct consistency. Sweet potatoes contains different amount of water content so I added in the G.R Flour batch by batch.
    3.  I then divided the dough into 4 equal-sized pieces. Using my hand, I gently roll each piece out to form a log about 2cm wide and use a knife to cut 2cm long pieces. This is purely depends on the size of the end product that you like. Before I roll the entire dough I make a few to trial on the sizes.
    4. I lightly floured my hands and roll each piece of dough into a ball. Using my thumb, I created a dent in the center of the ball, place small pieces of palm sugar onto the dent, wrap and roll back into a ball. Repeat with the remaining dough.
    5. Bring a large pot of water to a boil. Carefully place the balls into the pot of boiling water, immediately stir the water so that it doesn't stick to the bottom. Do not overcrowd the pot. I boiled mine in 4 batches. Cook over medium heat until the balls float on the surface, reduce heat and let it simmer for another 5 to 10 minutes depending on the size of the balls. 
    6. While waiting for the balls to float, grease the plate that you would want to transfer the balls to, so that it does not stick to the plate and remember not to stacked them too.They are very sticky. Once the balls are done, drained and placed on the greased plate.
    7. Mix well 1 cup of desiccated coconut with a generous pinch of salt. Roll each ball on the mixture until evenly coated. Then its action time. Nom Nom NOM.


    Dough
    Dent the center of the ball to place the palm sugar. The dough pieces in this picture is slightly over size to my liking I have then resize it smaller

    Sweet potato ball before it goes into the pot


    TIPS:

    Dough: If the dough is too wet add in more flour n vice versa, until it reaches the correct dough consistency.

    Size of the balls: Make sure it is not too small as you will not be able to insert generous amount of palm sugar into it, thus, the bursting of melt palm sugar in your mouth may not happen. However, if it is too big you may not thoroughly cook the ball through (although it floated) and so lead to piece of palm sugar still sitting in the balls.

    Saturday, May 17, 2014

    Egg Muffin Breakfast 1


    Look at the layers


    I am a bit tired of my oat breakfast lately so I figured I need bring in some excitement for my breakfast. Therefore, I decided to make egg muffins breakfast today so that I can have it for today and kept it in refrigerator for the rest of the week. Egg muffins are very versatile, you can basically put in anything you want but make sure it is cook through, any topping, amount of salt and pepper to your taste bud. This time around, I used ready make hash brown from Woolworth as the base. I cut it into smaller pieces so that it can fit snugly in the muffin pan. I then top it with diced cup mushroom, wilted baby spinach and rocket,  smoked turkey breast form Deli at Woolworth then pour in whisked egg and top with saute brown onion, some cheese and cayenne pepper.

    For an healthier option, of course you can substitute the hash brown with diced boil potatoes. Add some salt into the boiling water so that the boiled potato did not turn out to be bland and swap smoke turkey breast to cook chicken breast pieces. You may scrap potatoes form recipe this together but remember your body need carbohydrate to do it essential functions.

    So this is how I make my Egg Muffin Breakfast version 1.

    Ingredients:-

    3-4 pieces of ready make hash brown cut into pieces (not fried before hand)
    3/4 cup of roughly diced cup mushroom
    150g spinach and rocket, wilted, cover for 30 seconds in hot water
    200g smoke turkey breast, roughly pulled or diced
    5 Eggs for 6 cups muffin pan, whisked with a pinch of salt and 1/8 pepper
    1/2 medium brown onion, diced and lightly saute with olive oil and a pinch of salt
    Cheese enough for toppings (any cheese you desire )
    Cayenne pepper, sprinkle
    Olive oil to saute the onion and grease the pan


    Method:-
    1. Preheat over at 180 degree C. Grease muffin pan with olive oil. It has to be grease properly so that removing the breakfast muffin from the pan doesn't turn into a frustrating job. You can line with paper liners too.
    2. To assemble the egg muffin, I snugly placed cut hash brown at the based of the muffin cup pan. Then I put in the cup mushroom, wilted baby spinach and rocket and pulled smoked turkey breast. I then pour in whisked egg. Go easy on the salt in the whisked egg because smoke turkey is already slightly salted. Pour up to 3/4 of the muffin cup. Top with lightly sauteed onion, cheese and sprinkle of cayenne pepper.
    3. Bake in preheated oven for 20 to 25 minutes or until a toothpick inserted in the middel comes out clean.
    4. Serve and enjoy.

    Snugly placed potatoes pieces. Clearly Mr. Husband not sure where to focus

    Waiting for whisked eggs to fill in. One side already have the sauteed. Will top the other side with sauteed onion after the egg pouring

    Filled. The far end cups were top with saute onions after the eggs pouring

    Overflowed eggs - mental note: should shake it so that it is evenly distributed


    Tips:

    Saute the onion : Diced half a brown onion. Heat a teaspoon of olive oil at medium heat, sprinkle a pinch of salt and lightly saute the diced onion until fragrant. See a side to cool.

    Onion topping:I prefer to top sauteed onion one the whisked egg because I am not a fan of 'soggy' onion. I enjoy the caramelized bit of the onions.

    Egg: Filled up to 3/4 only and give it a little  shake so that it is distributed evenly.

    Leftovers: Leftover can be saved in the refrigerator for throughout the week for breakfast

    Colours: Add some red or yellow capsicum or pumpkin for colours.


    Happy trying and enjoy !

    Saturday, June 22, 2013

    Steamed Banana Cake 1

    Hi, I know I have been missing for awhile from here. Wait ! No! It's actually quite long. It's actually more than a year ago to be precise. Life has been to busy for the last year and it's going to be busy for the next 6 months.

    Before I posted my last post last year Bailey's Cake (As easy as ABC), I took out Kickboxing and Muay Thai classes which then lead to Strengthening and Kettlebell Classes and also Yoga. This activities of mine plus work and social gathering took out most of my time. Although I did cook at that time but I find it difficult to find time to update my blog. Since my last post, I have also moved house, my boyfriend decided to propose and I have just recently got married legally (5 days ago) with wedding reception to follow in  December and I have to say planning for a wedding is as good as a full time job not to mention about the worries and stress.

    So there's the summary of the reason that cause my absence from my blog. I would also like to this opportunity to thanks my blog viewers for your support regardless of my absence. I am truly touch.

    With this let's move on to my first post for 2013 or first post as a married women :) "Steamed Banana Cake". This cake is simple and minimum tools are used.


    Ingredients:-

    170g Butter (I used salted butter)
    170g Sugar (I used castor sugar)
    4 Eggs (I like to leave the eggs to room temperature) - Beaten

    300g Banana (Without skin) - Mashed

    260g Self Raising flour (If you only have plain flour on hand - use 250g plain flour and 1 tsp baking powder or baking soda) - Sifted

    1/8 tsp Salt
    1/2 tsp Banana Essence (Optional)
    1/2 tsp Vanilla Essence (Optional)

    Methods:-

    1. Melt butter and sugar in the pot big enough to accommodate the rest of the ingredients above if you are trying to minimize cleaning later on. Make sure the butter and sugar dissolves over low heat. Set aside for the mixture to cool down.

    2. Meanwhile,you can grease the cake pan (I greased mine with butter. You can use vegetable oil or line it with baking paper), beat the eggs, mashed the banana and sift the mixture of self raising flour and salt. I only use fork to beat the eggs and mashed the bananas. Remember to heat up the steamer too.

    3. Once the mixture cool down a little (cool enough to the extend where it does not cook the egg), add in beaten eggs and mix it well and then followed by mashed banana. Mix well.

    4. Fold in mixture of sifted self raising flour and salt in 3 additions. Remember to fold only in one direction.

    5.  Pour the cake batter into the greased pan. Make sure the water in the steamer is boiling before you put in the cake pan. Steam on high for 40 minutes. You may need more than 40 minutes or less that 40 minutes. To make sure test with the tester, if the comes out clean the the cake is ready. In my case I use knife. My tester is no where to be found.

    6. Once the cake is done remove it from the steamer, let it cool down for awhile before turning out onto cooling rack. Let cool a little bit more before you cut it into pieces.


    TIPS: 

    Be careful when you remove the steamer lid so that the water on the lid does not drop on to the cake surface. I just remove it as fast as could without tilting it. I then wipe the surface (watery part) of the lid before I put it back on.


    Wednesday, May 9, 2012

    Baileys Cake (As easy as ABC)


    When I brother came a few weeks ago, he asked me what do I want from the duty free place. So I said I want Baileys. Baileys + Ice Cream = Fantastic. However,this morning I was craving for cakes. Any cakes. So, I decided to try baking Baileys cake. Then, I went to the kitchen scrape whatever cake baking ingredient I have in the pantry and to my delight I manage to scrape enough ingredient to bake a cake. Yeay!!!!

    This is a very easy and straightforward recipe and very suitable for lazy Sunday baking.

    Ingredients:

    125g butter or margarine
    1 cup sugar
    2 eggs
    1 cup Baileys
    2 cup self raising flour
    1 tbsp cocoa powder (That's all I have left in my pantry. Feel free to add more. Add some milk or more baileys if your cake mixture appears to be thick)


    Methods:

    1.  Preheat oven at 180 degree.

    2. Melt butter in saucepan large enough to mix all ingredients.

    3. Remove from heat and add sugar. Mix well and add eggs. Make sure the saucepan is cool enough before you add in the eggs because you don't want to cook the eggs.Mix to combine then stir in Baileys.

    4. Sift flour and cocoa powder into mixture and fold in.

    5. Line the bottom of a 20cm cake tin with baking paper and pour in the mixture.

    6. Bake at 180 degree for 45 minutes or until the cake tester comes out clean.

    7. Cool in tin for 5 minutes before turning out onto the cooling rack.

    8. Feel free to sprinkle icing sugar or butter cream or ganache or coffee cream - (1 tbsp instant coffee, 1 tbsp hot water, 2 tbsp baileys and fold in 300ml whipped cream)


    Sunday, May 22, 2011

    The Not Very Mexican Eggs

    TO FIND OUT MORE ABOUT INTERNATIONAL INCIDENT, PLEASE CLICK HERE


    OK... It's about time to pull my socks up. Why? Partly because the weather is getting cold in this part of the world... and mostly because I seriously have to dedicate more of my time to keep this blog updated. I have been cooking and trying recipes, however, I am still struggling to find to time to post it in the blog.

    So yea... I cooked this not very Mexican eggs  this morning. Why not very Mexican because I skip the red chillies and replace cannellini beans with baked beans. I LOVE baked beans. Although this Mexican eggs is holding it's 'not very' title, this is a recipe worth trying because it is easy, quick, delicious, not too heavy nor light and you will want to come back for more.


    Here's the recipe:

    Ingredients:-
    • 1 tbsp olive oil
    • 250g / 2 Chorizo, chopped
    • 1 clove garlic, finely chopped (Optional)
    • 4 tomatoes, chopped (Due to my laziness I used 400g canned diced tomatoes)
    • 2 medium red capsicium, seeded and chopped
    • 2 red small chilies, finely chopped (Optional)
    • 400g cannelini beans, rinsed and drained (I substitute with 420g baked beans, it's OK if you can't completely drain the tomato sauce)
    • 1 - 2 tbsp dried flakes parsley (If you are using fresh parsley - 1/4 cup chopped)
    • 4 eggs, poached
    • Salt and Pepper to taste
    • 4 slices of toast, to serve
    Steps:
    1. Heat oil in a frying pan on high. Cook chorizo for 2-3 mins, turning until slightly brown. Push the chorizos aside, add in garlic in the center of the pan, lightly stir the garlic until fragrant. Then, mix together with chorizo. Continue turning the chorizos until brown. 
    2. Add tomatoes, capsicums and chilli (if you are using any). Cook / mix well for 5-8 mins or until the tomatoes collapsed and capsicums are soft. 
    3. Add parsley and beans and stir to combine. Heat on low for 1 min or until beans are warmed through.Add salt and pepper to taste before serving.
    4. Meanwhile, to POACH eggs, half-fill a saucepan with water. Heat on medium until boiling, Reduce heat to low or until just gentle bubbling. Crack an egg into a small bowl. Whirl water with spoon to create a little funnel then slip egg into the whirlpool. 
    5. Poach for 3-4 mins, gently spooning over water until white is set and yolk runny. 
    6. Using a slotted spoon, remove egg and drain on paper towel. Repeat with remaining eggs.
    7. Spoon bean mixture onto serving plates and top with poached egg. Serve with toast and butter.
    And yeay its NOM NOM time again !!!

    Thursday, March 3, 2011

    Pineapple Tarts


    OK! I know Chinese New Year has long gone and here I am sharing the Chinese New Year 'staple' cookies. Never too late and who says you can only make Pineapple Tart for Chinese New Year? ;p... I will make this everyday and distribute it to my friends of I ever have the time to do so.

    First of all, in order to make the pineapple tart of course we need to make pineapple jam first. Pineapple here is expensive so I turn to canned pineapple instead. One good thing about canned pineapple is that it is for sure ripe and sweet... hehe.. So, here's the ingredients and steps you need to make pineapple jam.

    Pineapple Jam

    Ingedients:
    • 2 large canned pineapple ( Can't remember how heavy mine was 700g perhaps)
    • 10 tablespoon sugar (Adjust according to your taste. Usually amount of sugar is equavalent to amount of pineapple pulp. Eg: 1 cup sugar to 1 cup pineapple pulp )
    • 1 tbsp lemon juice (optional)
    • 1 teaspoon cornflour mixed with 1 teaspoon water
    • 1 cinnamon stick (optional)

    Steps:
    1. Drain canned pineapple slices and squeeze out the juices using hands. Blends the pineapple until fine, about 10 seconds. If you do not have blender than hand chopped the pineapples.
    2. Using medium heat, cook pineapple, lemon and sugar until most liquid evaporated and the filling turn golden. Remember to constantly stir the filing so that it doensn't burn. 
    3. Add more sugar as needed.
    4. Mix cornflour with water and pour into the filling to thicken it.
    5. Then, let it cool in the fridge.
    While waiting for the jam to cool, we move to making the pastry/tart.

    Pastry/Tart

    Ingredients:-
    • 2 1/2 cups plain flour
    • 2 tbsp corn flour
    • 1/4 tsp salt
    • 5 - 6 tbsp icing sugar
    • 225 grams butter, soften the butter at room tempreture
    • 2 egg yolks, room tempreture
    • 1 egg yolk (lightly beaten for egg wash)

    Steps:
    1. Sieve plain flour, corn flour, salt and icing sugar in a mixing bowl. 
    2. Add in butter that are already soften in room tempreture and egg yolks.
    3. Knead to form the dough.

    NOW, it's time to put everything together. 


    1. Preheat oven at 180 degree celcius.
    2. Prepare baking tray and line with baking sheet.
    3. Divide the dough and jam to 24 equal rounds. If you want to make a smaller size pineapple tart then feel free to make it into smaller rounds which may sum out to 30 equal rounds.
    4. Flatten the pastry dough with the palm and put the pineapple filling in the middle and use the dough to cover the fiiling. Use your palm to shape into roll (what ever length you desire) and use fork to make criss cross pattern on the tart/roll.
    5.  Then, place in the prepared baking tray. Put 1 inch apart. Once the baking tray is full, brush the tart with egg wash and bake in preheated oven for 20 - 25 minutes or until light brown.
    The Jam


      LinkWithin

      Related Posts with Thumbnails