Showing posts with label chocolate. Show all posts

Saturday, October 17, 2015

Dark Chocolate Butter Ganache


There are many uses of ganache. Depending on the temperature of the ganache, it can be use to pour over the cake, to use it for frosting and to sandwich the cake.


Ingredients:

  • 200g dark chocolate
  • 120g salted butter
  • 125ml (1/2 cup) double cream or thickened cream

Method:
  1. Using double boiler, add in chocolate, butter and thickened cream. Make sure the bowl does not touch the water and the water should be barely simmering.
  2.  Let the heat melt the ingredients. It will take about 3 minutes. Combine the ingredients well and leave it for 2 minutes. It will look liquid. Remove from double boiler and cool it down in the fridge to thicken. The duration in the fridge is very much depending on the purpose of the ganache.
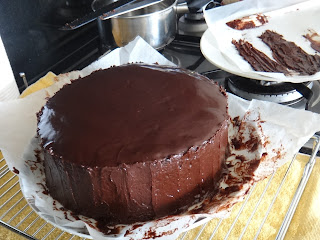
  3. I used this ganache to pour over chocolate mud cake I have made earlier, therefore, I place the ganache in the fridge for an hour to thicken. 
  4. To pour it on the cake,  I prefer to remove the top bit of the cake to get even surface. Pour starting from the edge of the cake then move to the middle and smooth out.


TIPS:
  • Before placing the ganache in the fridge cover the top of ganache with cling wrap so layer of skin does not form (cling wrap touching the ganache top) 
  • Thicken ganache consistency suitable for pouring on the cake? Stir with whisk, remove and you can see ribbon form. 
  • Over thicken the ganache for pouring? No worries. You can spread the the chocolate ganache on the top and the side or even use it to sandwich the cake. 
  • Use baking paper to catch the drips of the ganache so that the yummy-licious ganache did not go to waste.

Friday, October 16, 2015

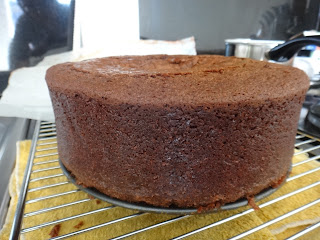
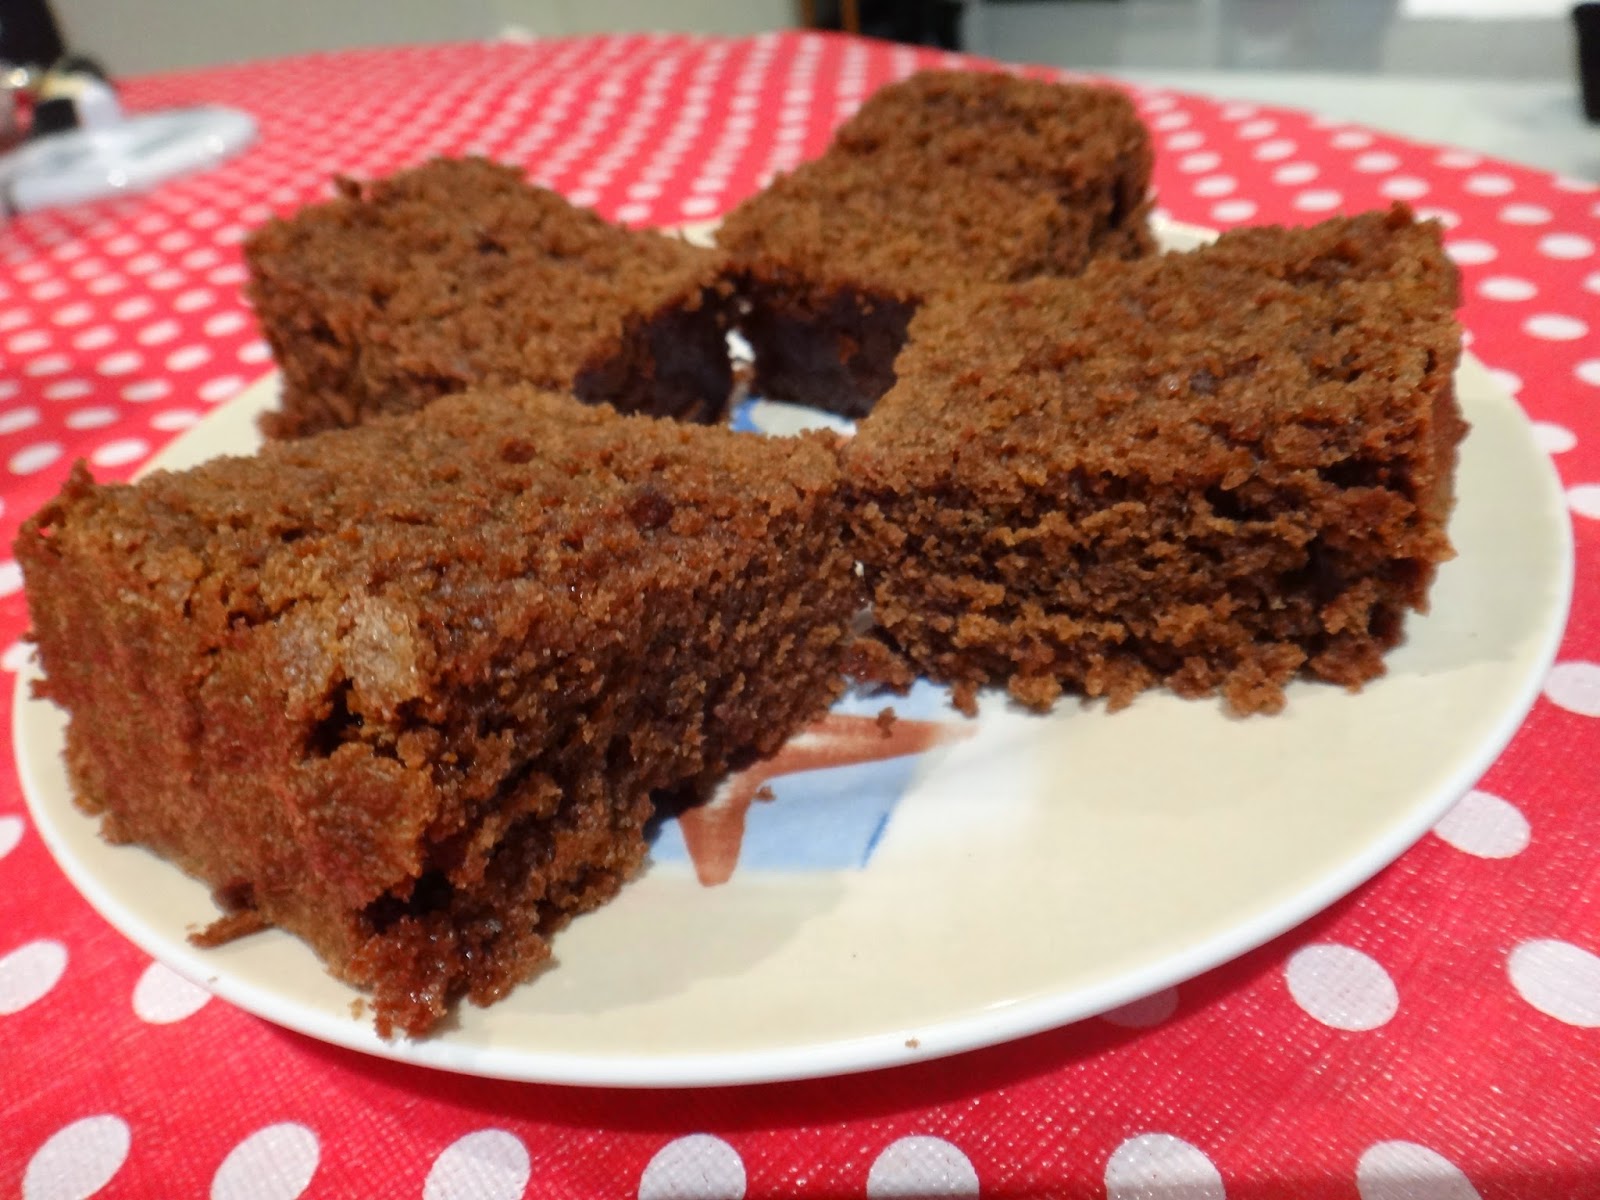
Chocolate Mud Cake


This is yet another chocolate overloaded recipe. I serve this rich chocolate mud cake  with chocolate butter ganache.

If you are using instant coffee then you will not need 2 tbsp of sugar.


Ingredients:
  • 250g butter, cubed
  • 250g chocolate (semi sweet)
  • 330g granulated sugar
  • 2 tbsp granulated coffee + 2 tbsp sugar + 175ml (3/4cup) hot water
  • 125 ml milk, cold
  • 4 eggs
  • 30ml (2 tbsp) vegetable oil
  • 300g (2 cups) self raising flour
  • 1 tsp salt
  • 55g (1/2 cup) cocoa powder


Method:
  1.  Preheat oven at 150 degree celcius. Grease or line pan with baking paper.
  2. On double boiler (make sure the barely simmering water did not touch the bottom of bowl). Add in butter, chocolate, sugar, and coffee mix. Melt it all. it will take about 5 minutes. Once all melted remove bowl from pot and set aside. Let it cool down for 30 seconds. 
  3. Meanwhile prepare the dry ingredients. Mix together self raising flour, salt and cocoa powder.
  4. Add milk into the chocolate mix to reduce the temperature of the chocolate mixture. Whisk to mix well. I used electric mixer. 
  5. Before you  add in eggs please ensure that the mixture is not too hot otherwise the egg will turn into scramble egg. Add in egg one at a time and mix well. 
  6. Add in vegetable oil and mix well. 
  7. Now its time for dry ingredient. Add dry ingredients you prepared earlier in 3 addition. Combine well.
  8. Pour chocolate mixture mud cake mixture into prepare pan. 
  9. Place in preheated oven at 150 degree Celsius for 2 hours or until the tester comes out clean. Let it cool for 10 to 15 minutes and unmold. Let it cool on the cooling rack. 
  10. Serve just like this or in my case i made dark chocolate butter ganache for the cake.Make sure the cake is completely cool before you pour over the ganache.
Remove the top crust if you want to have even top
Use baking paper to catch the dripping chocolate.

ENJOY!!

    Tuesday, September 15, 2015

    Chocolate Chip Cookies (Salted?)


    Who don't like chocolate chip cookies? This recipe create crispy edge and chewy center chocolate chip cookies. However, if you prefer crispier cookies (no chewy center) extend baking time 1 to 2 minutes more than specify in the recipe.

    For this recipe, I melted the butter because I forgotten to leave the butter at the room temperature to soften. With this melted butter, I notice that the mixture appear to be slightly wet. I refrigerate the mixture in the refrigerator for 20 minutes before I shape it and baked. If you have extra minutes to spare and forgot to leave the butter out, you can melt butter in microwave and leave it cool at room temperature.

    Sorry for the lack of pictures, and Oh! this recipe gave me about 45 pieces of chocolate chip cookies of that size (please see picture above).

    Ingredients:-
    • 1 cup (250g) butter, room temperature to soften (I used salted butter)
    • 1 1/2 cups brown sugar (packed)
    • 2 eggs (room tempreture)
    • 2 tsp vanilla extract
    • 3 cups self raising flour
    • 1/3 cup chocolate/ cocoa powder
    • 1/2 tsp salt
    • 2 cups semi sweet (dark) chocolate chip
    • Seasalt to sprinkle if you are after salted chocolate chip cookies
    Method:-
    1. Preheat oven at 180 degree Celsius and line tray with baking paper or grease the tray.
    2. Wet ingredients: Cream butter and brown sugar. Add eggs, one at a time and whisk till combine. This will loosen the mixture. Add in vanilla extract and combine. Set aside.
    3. Now, it's time for dry ingredients. In another bowl combine well self raising flour, chocolate powder and salt.  
    4. Add dry ingredients into wet ingredients in 3 additions. Mix well after each additions. 
    5. Once done, add in chocolate chips. I use chocbits that could hold it shapes for baking. Mix well.
    6. I refrigerated the cookie dough for 20 minutes because instead of soften the butter at room temperature, I've melted the butter in microwave.
    7.  After 20 minutes (cookie dough have firmed up), I use tablespoon for size and shape it to round. Place the shaped cookie dough on the baking tray 1 inch apart because the cookie will expand in the oven. 
    8. Bake for 12 - 13 minutes depending on the size of the cookies and your oven. Or I shall say bake until the side is golden. Once ready, remove for the tray from oven let the cookies cool down a bit before carefully remove the cookies to cooling rack. 
    TIPS:
    • For Salted Chocolate Chip Cookies sprinkle some seasalt on the shaped cookies dough before you bake it.
    • I find that refrigerated cookie dough did not flatten as much and it appear crispier.

    Sunday, June 29, 2014

    Moist and Light Chocolate Cake (No electric mixer/beater needed !!!)


    Who is not into chocolate cake? I am always into chocolate cake but the problem is sometimes I just want to be able to mix the ingredient up with very limited equipment used and stick it into the oven  and eat it. Cadbury kitchen recipe definitely save my day today. Thumbs up to #cadburychocolate #cadburykitchen and I did amend the recipe here and there. For original recipe please click the link above. One last thing this recipe is definitely a keeper.

    Ingredients:
    • 1/2 cup water (original recipe call for 1 cup water. I used 1/2 cup water and 1/2 cup milk)
    • 1/2 cup milk
    • 1 1/8 cups caster sugar
    • 125g butter
    • 1/2 cup drinking cocoa powder
    • 1 1/4 cups self raising flour
    • 2 eggs, lightly beaten
    • 1/2 tsp vanilla essence (optional)
    • 1/4 tsp salt
    • 50g chocolate bits (optional)

    Methods:
    1. Preheat oven at 180 degree and greased or line cake pan.
    2. Combine water, milk sugar, butter and cocoa in a saucepan and warm but do not boil, stirring until sugar dissolved. Then bring to the boil and simmer gently for 2 minutes. Transfer mixture to a bowl and cool for 30 minutes. To speed up the cooling process you can stick it into fridge. 
    3. Add vanilla essence, salt and chocolate bits and mix well.
    4. Then add SR flour and lightly beaten eggs and mix until just combined. 
    5. Pour into a greased or lined cake pan. Bake in the oven for 40 minutes or until the tester comes out clean. Cool for 10 minutes before moving to wire rack to cool completely.


    TIPS
    • Ingredients should be at room temperature for at least 30 minutes
    • Make sure the chocolate mixture is cool properly before you add in flour or eggs otherwise you will need to deal with clumped flour or scrambled eggs.

    Wednesday, May 9, 2012

    Baileys Cake (As easy as ABC)


    When I brother came a few weeks ago, he asked me what do I want from the duty free place. So I said I want Baileys. Baileys + Ice Cream = Fantastic. However,this morning I was craving for cakes. Any cakes. So, I decided to try baking Baileys cake. Then, I went to the kitchen scrape whatever cake baking ingredient I have in the pantry and to my delight I manage to scrape enough ingredient to bake a cake. Yeay!!!!

    This is a very easy and straightforward recipe and very suitable for lazy Sunday baking.

    Ingredients:

    125g butter or margarine
    1 cup sugar
    2 eggs
    1 cup Baileys
    2 cup self raising flour
    1 tbsp cocoa powder (That's all I have left in my pantry. Feel free to add more. Add some milk or more baileys if your cake mixture appears to be thick)


    Methods:

    1.  Preheat oven at 180 degree.

    2. Melt butter in saucepan large enough to mix all ingredients.

    3. Remove from heat and add sugar. Mix well and add eggs. Make sure the saucepan is cool enough before you add in the eggs because you don't want to cook the eggs.Mix to combine then stir in Baileys.

    4. Sift flour and cocoa powder into mixture and fold in.

    5. Line the bottom of a 20cm cake tin with baking paper and pour in the mixture.

    6. Bake at 180 degree for 45 minutes or until the cake tester comes out clean.

    7. Cool in tin for 5 minutes before turning out onto the cooling rack.

    8. Feel free to sprinkle icing sugar or butter cream or ganache or coffee cream - (1 tbsp instant coffee, 1 tbsp hot water, 2 tbsp baileys and fold in 300ml whipped cream)


    Monday, November 8, 2010

    Orange Choc Swirl Cake

    This is a wonderfully flavoured and cottony soft cake. I used concentrated orange juice and orange zest to get the orange taste, smell and flavour.

    Ingredients:-
    • 3 eggs
    • 1 cup caster sugar
    • 240g (1 cup) butter, softened
    • 1/2 cup milk
    • 2 cups self-raising flour
    • juice of 1/2 an orange (make up about 1/3 cup orange juice)
    • zest of 1/2 an orange or more
    • 1/4 cup cocoa powder 

    Methods:-
    1. Pre heat oven to 160 degree celcius. Grease or line baking tin with baking paper. 
    2. In a mixing bowl, lightly beat the eggs, then add butter and sugar. Beat until light and fluffy using electric mixer over high speed.
    3. Add milk and fold in flour alternately in 3 times, starting and ending with flour. Only add after each addition is well combine.
    4. Divide mixture into two equally. In first batch of mixture, add orange juice and orange zest and mix well. Into second bath mixture, add cocoa powder and mix well. 
    5. Pour the mixture into baking tin. This part is totally up to you. You can pour the one with orange mixture and then cocoa powder mixture and gently stir with skewer to get a marble effect OR pour then alternately in 2 batches for each mixture then stir gently with skewer for marble effect. 
    6. Then, pop into preheated oven and bake for 18 to 20 minutes for cupcake size and 30 minutes for large size cake or bake until the tester comes out clean. 
    7. Allow to cool before transering to wire rack.

    Monday, October 11, 2010

    Ever Versatile Butter Cake

    I have been missing the good old fashion butter cake lately, which is light, fluffy and buttery. I still have some mixed berries purees so I decided to make marbled way butter cake by adding mixed berries puree with the cake batter. To my total disappointment although I really like the puree's marbling effect, the cake doesn't turn as tasty as I want it to be. So, two days later, I tried baking with another butter cake recipe and marbled with cocoa powder and this time the cake turns out perfect as I want it to be. Although the first recipe does not turn out great but you still adopt its puree marbling effect. Please be reminded that all ingredients below should be at room temperature.

    Ingredients:-
    • 3 eggs, separate the white and yolk
    • 125g butter
    • 1 cup sugar (I use white sugar) 
    • 1 tsp vanilla extract
    • 1 3/4 cup self raising flour, sift with 1/4 tsp salt (I use half half because I run out of self raising flour)
    • 120ml milk
    • 3/4 tsp lemon juice
    Method:-
    1. Preheat oven at 180 degree celcius. Line pan with baking paper, grease and lightly floured. 
    2. Separate egg yolk and white in two different bowl.
    3. By using electric mixer, beat butter until soft and add in 3/4cup of sugar. Beat until light and fluffy. Add yolk one at a time and beat well after each addition. Scrape the side and add in vanilla extract and beat until well combined. 
    4. Fold in flour mixture and milk, in 3 addition alternately. Combined well after each addition. Then, set the batter aside.
    5. In  another clean mixing bowl, beat egg white until foamy and add in lemon juice. Continue beating until soft peak form. Then, gradually add in the remaining sugar and continue beating until stiff peaks form.
    6. Gently fold a little of the whites/meringue into the batter to lighten it, and then, fold in the remaining white/meringue till well combine. Do not over mix because the white will deflate. It is alright to have some white streak left. 
    7. To get the marble effect: (1) scope 3 tbsp batter and mix with 30ml mixed berries puree; (2) mix 3 tsp cocoa powder with 1 tsp hot water, then, scope 2 tbsp batter and mix with the cocoa mixture, dollop on to the remaining batter and swirl with fork OR (3) mix 6 tsp cocoa powder with 2 tsp hot water, divide batter into 2 parts and add the cocoa mixture in one of the part, assemble them. For modest original butter cake, skip the marbling steps.
    8. Pop into preheated oven and bake for 40 minutes (depending on your oven) or until the tester comes out clean. 
    9. Cool cake in their pans on wire rack for 10 minutes, the remove from pan and cool on wire rack.
    after swirling


    The one with mixed berries puree

      Thursday, September 16, 2010

      Fruity Chocolate Brownies

      The brownie first appear in public during the 1893 Columbian Exposition. This dessert was created for ladies attending the fair. It should be smaller than apiece of cake and easily eaten from boxed lunches. The brownies is sliced from a type of dense, rich chocolate cake, which is in texture like a cross between a cake and a cookie. They can be either fudgy or cakey depending on their density. Nuts, chocolate chips or dried fruits may also be include in.

      So, back to this brownies. This is a brownie with dry cracked crust, so don't worry when you see those cracks. Those cracks are the symbol of your success.. he he.. :D. Besides the dry cracked crust, this beauty has a wonderful moist texture and deep chocolate flavours of course.. emm.. fudgy or cakey, you ask me.. I would say cross of fudgy and cakey. Why you should try this brownies recipe? It only uses 1 bowl and a hand whisk or spatula.

      Baking brownies can be a challenge too. Unlike cake, you don't want the tester to come out clean. If the tester comes out clean, then, that means you have overbake the brownies. So, please use baking time stated as a guide only and test your brownies (in the centre) few minutes before end time. Your brownies are done when the tester still has a little batter sticking to it.


      Ingredients:-
      • 225g milk chocolate, chopped
      • 120g butter, cut into pieces
      • 2 tbsp cocoa powder
      • 1/2 cup sugar
      • 1 tsp vanilla extract
      • 3 eggs, room tempreture
      • 2/3 cup (95g) plain flour
      • 1/4 tsp salt
      • 1/4 cup mixed dried fruits or more 

      Methods:-
      1. Preheat oven at to 180 degree celcius. Grease and line baking paper a 20cm square pan. 
      2. Melt the chocolate pieces and butter in a alrge stainless steel bowl placed over a saucepan with simmering water. 
      3. Once the chocolate and butter have melted, remove from heat at stir in cocoa powder and sugar.
      4. Next, whisk in vanilla extract and egg, one at a time. beat well after each addition. 
      5. Then, stir in flour, salt and dried mixed fruits. 
      6. Pour into the prepared pan and bake for about 30 minutes or until the tester inserted in the centre comes out with a few crumbs attached.
      7. Remove from oven and let it cool at wire rack. 
      8. Serve at room tempreture or chilled. Serve with ice cream or whipped cream.


      TIPS:
      • Although the recipe call for adding mixed dried fruits you could substitute with chopped nuts or chocolate chips.

      Wednesday, August 11, 2010

      Banana Chocolate Cake with Chocolate Ganache

      Very uneven coat.. but its my first time doing coating...


      How bana-choco-licious is this... hahahaha..... i love both bananas and chocolates.. so that's how this recipe makes its way to this blog....

       For Banana Chocolate Cake

      Ingredients:
      • 1 cup (150g) self raising flour
      • 1/4 cup (35g) cornflour
      • 1/4 cup (25g) Cocoa powder, I use drinking cocoa powder
      • 2 eggs
      • 125g butter, softened
      • 1 tsp vanilla extract
      • 1/4 cup + 1/2 tbsp milk
      • 2 medium ripe banana, mashed
      Method:
      1. Pre heat oven to 180 degree celcius (160 fan forced). Grease a deep 20cm round cake pan and line base with baking paper.
      2. Place the self raising flour, cornflour, cocoa powder, eggs, butter, vanilla extract and milk into a mixing bowl. Beat on slow speed until all ingredients are combine then beat on medium speed for 4 minutes or until the mixture turns pale. 
      3. Mix in mashed banana and mix well.
      4. Spread the mixture onto prepared pan. Bake fort 40 minutes or until cooked when tested. (Skewer comes out clean). Turn onto a wire rack, top side up to cool.
      5.  Split cake into half and join with banana-chocolate ganache (recipe below). Then top /cover/glaze wth chocolate ganache (recipe below).


        For Chocolate Ganache

        Ingredients:-
        • 375 g milk chocolate, chopped
        • 1 1/2 cup thickened cream
        • 1 medium size banana, roughly diced if you want to mix it in chocolate ganache alternatively you can sliced the banana and put on top of ganache after you spread them
        Methods:-
        1. Place chopped milk chocolate in a large bowl.
        2. Heat heavy cream on medium high heat until boil. 
        3. Remove from heat and immediately pour over the chopped chocolate and stir until completely mixed and glossy.
        4. Remove 1/3 of chocolate ganache away from large bowl, mix with diced banana and refrigerate it so that it will could reach spreadable (thicker)consistency for the fillings.
        5. Leave remaining chocolate ganache at room tempreture for it to cool before pouring over cake. 
        Consistency for coating
        Spreadable consistensy


          TIPS:
          • Best for pouring/glaze/cover the cake: chocolate ganache should be at barely warm state.
          • 375g chocolate = abt 390ml
          • Want to know more about Ganache? CLICK HERE

          Friday, August 6, 2010

          Ganache (All about, well, almost all)


          Let's start with the meaning of Ganache.  Ganache is a smooth mixture of thickened cream and chocolate. You can use dark chocolate, milk chocolate or white chocolate.Dark chocolate gives superb colour and rich flavour. Butter that is added into the chocoloate mixture will result in shinier glaze. The taste and quality of ganache is very much dependant on the chocolate you use. It is also possible to add liquor, liqueur, gourmet flovouring oil, fresh or canned fruit puree, frozen fruits concentrate and nut butter .

          The word 'Ganache' sounds really scary. It give me this impression that it is a very complicated stuff. I even came across a forum saying that amateur baker shouldn't try making ganache. Emmm.... Well, after all the research and experiment, I could summarize Ganache in 3 words... 'thickened/heavy cream, chocolate and tempreture'.

          Room tempreture maybe vary depending to where you are and season. If you are in warm climate or season, your room tempreture maybe higher, which means, if you keep your ganache in room tempreture it takes longer time to cool off or thicken. So putting in refrigerator or soak you ganache bowl in a bucket of ice maybe a great option to let it reach or stay at the consistency you wanted. Vice versa, if you are at the colder climate or season, your room tempreture maybe be lower, therefore, your ganache may reach colder or thicker consistency at faster rate. Of course you can refrigerate them too if you want. If you want to maintain your ganache consistency in coller climate you may sit the ganache bowl on a small saucepan half full of simmering water or hot water. Make sure the bottom of the bowl doesn't touch the water.

          To make ganache, hot cream is pour over chopped chocolate and whisk until smooth. The rule of thumb to make ganache is an equal proportion of thickened cream and chocolate.However, the proportion of chocolate and cream very much is depending on its use.

          Uses of Ganache:
          1. Glaze or coat: one part cream & two parts chocolate; pour liquid ganache over cake when it is barely warm because at this point the ganache will not be too runny or too thick, if you want harder glazing/coating you should have higher chocolate ratio to cream
          2. Filling: one part cream & one part chocolate; pop in refrigerator for 25 to 30 minutes to get spreading consistency/ thicken before spreading it over the cake. For fluffier consistency whipped them just like how you whipped whip cream.
          3. Fluffy Frosting: one part cream & one part chocolate; refrigerated until thicken, ganache is ready for frosting or whipped when you are able to spoon the ganache and the texture hold, whipped just like how you whipped whip cream for fluffier texture and pipe it.
          4. Decorative Piping: one part cream & one part chocolate; refrigerated until thicken or until when you are able to spoon the ganache and the texture holds, dark smooth piping mixture good for piping words or outlines on the cake.
          5. Truffles: one part cream & two parts chocolate (less cream more chocolate harder texture); refrigerated until well thicken. Make make it into small balls.
          6. Chocolate mousse: two parts cream & one part chocolate (more cream less chocolate for lighter texture)
          7. Chocolates sauce for ice cream: cool until it is pourable or at the consistency you like
          8. Dips for fruits 
          9. Hot chocolate: Heat up milk and add as much ganache as you like
          10. Toppings/Spread for pancakes, muffins, bread

          How to cover/glaze/ frost cake with ganache:-
          Brush any loose crumb from cake, place cake on wire rack and pace wire rack on baking sheet or large plates for easy cleaning purposes. Then, we should crumb coat the cake in order to got smooth finished. Use about 3 tablesppon of ganache to cover the the top and sides of the cake. Refrigerate for 5 minutes to set the crumb coat. To cover cake, pour remaining ganache or enough ganache on the centre of the cake and work outward quickly.

          Updated 26/08/10:  Dip spatula in hot water to clean off any crumbs or acumulation of frosting. Warmed spatula can also smooth and even out frosting.

          How to make truffle:-
          Form the well chilled ganache into small ball using hand or melon baller and rolled into cocoa powder. Place on baking paper to cool and solidify. Store in refrigerator but serve at room tempreture

          How to make chocolate mousse:-
          Spoon ganache into serving dish and refrigerate or whip the ganache until fluffy for light mousse texture before spooning into serving dish and chill


          Let's add some twist to ganache!!!!
          The following 'added' flavouring measurement is according to 2 cups thicken cream recipe

          Adding liquor or liqueur
          add 1/4 cup liquor or liqueur  = reduce thicken cream by 1/4 cup therefore its 1 3/4 cup thickened cream

          Adding gourmet flovouring oil
          Add a few drop and follow ther recipe measurement as it is

          Adding fresh or canned fruits puree
          if add 1/2 cup of puree = reduce thicken cream by 1/2 cup therefore its 1 1/2 cup thickened cream

          Adding frozen fruit concentrate
          if add 1/4 cup of concentrate  = reduce thicken cream by 1/4 cup therefore its 1 3/4 cup of thicken cream

          Adding nut butter
          Add 1/2 cup and follow the recipe measurement


          A Big NO-NO:
          • Never put them in freezer before whipping because it will comes out curdly
          • Do not over whipped ganache or else it will be chocolate butter 
          • If you decided to put chocolate bar in double boiler as well make sure the stainless steel bowl doesn't touch the simmering water because it will make the tempreture in the stainless steel bowl to high for chocolate thus 'spoilt' the chocolate i.e the chocolate will curdle/lumpy.

          KEY POINTS:
          • The coller it is the thicker the ganache and vice versa
          • Fluffiness: Cool and thicken. Beat / Whipped = Lighter in colour and may increses the volume
          • In warm wheather: keep ganache coated, frosted or fillied cake in refrigerator
          • Less cream More chocolate = Harder ganache
          • Lees chocolate More cream = Lighter ganache
           I hope this information is sufficient to ease your curiosity and difficulty in tackling ganache. Feel free to leave comments and/or additional information that I left out :)

            Friday, June 11, 2010

            Easy and Simple Steam Chocolate Cake


            This is a very convenience chocolate cake especially when you crave for warm dessert or chocolate cake late at night during cold nights......Just like me :).. This whole process took about 30 minutes.

            Ingredients:-
            • 4 tbsp self raising flour or plain flour
            • 4 tbsp chocolate powder (I used 3 tbsp milo & 1 tbsp drinking chocolate powder)
            • 4 tbsp sugar
            • 1 egg, lightly beaten
            • 3 tbsp milk
            • 3 tbsp cooking oil or melted butter
            • 1/2 tsp condensed milk (totally optional)
            ..........Enough to serve for 2......

            Methods:-
            1. Grease medium size bowl or tall mug take you want to use. Make sure they have enough space for the cake to raise. 
            2. Add in flour, chocolate powder and sugar. Mix well and try to get rid of lumps.
            3. Next, mix in lightly beaten eggs, milk, oil or melted butter and condensed milk(if you are using any). Stir and mix well.
            4. Add enough water to wok or pot for steamimg, place in steaming rack and put the cake mixture on top. Cover the wok or pot and put over high heat for 20 to 25 minutes or until a toothpick inserted into the centre of the cake comes out clean.
            5. Serve with whipped cream or ice cream. 

              TIP:-
              • Self raising flour or plain flour: Well both flour can be use, however, plain flour make the chocolate heavier while self raising flour make it lighter, fluffier and more moist. If you only have plain flour but wanted the self raising flour effect, add in baking powder.I personally prefer using self raising flour. 
              • You may add in chocolate chips, oat or dried mixed fruit into the mixture/batter before steaming.


              This is with plain flour


              This is with self raising flour. Pictures above with ice cream is from self raising flour too.


              Hope you will enjoy this recipe. Happy trying.... :)

              Thursday, May 27, 2010

              Simple Chocolate Cupcakes and Chocolate Glaze Icing

              Finally, first ever cupcakes recipe in this blog. YAAYY!!!! I loves chocolates so I decided to use chocolate as my first cupcakes experiment.

              I used 50cents coin shape of cupcake cups which is available in Woolworth, 200 cups for $2 and the sprinkles cost me $1.65. Since this is my first experience making cupcakes ever i decided to buy 'cheap stuff '.

              And the best thing about this recipe is that it doesn't need electric cake mixer (obviously i don't own 1).


              CHOCOLATE CUP CAKES

              Makes approx 40 (50 cents coins shape) or 14 (normal size )

              Ingredients :-
              • 1/2 tsp bicarbonate of soda
              • 1 cups sugar
              • 3 tbsp cocoa powder
              • 1 cup milk
              • 125g butter, roughly chopped
              • 11/2 cups self raising/rising flour
              • 2 eggs, lightly beaten

              Method
              1. Preheat oven to 180°C. I use fan forced oven. For non fan forced it is usually 10 to 20°C higher.
              2. In a large saucepan, mix bicarb soda, sugar and cocoa powder. Then add milk and butter. Heat (medium low) and stir until combined and put away from stove to let it cool a little.
              3. While waiting for the chocolate mixture to cool line the cupcakes cups on a baking tray, sift the self raising flour, lightly beaten the eggs. 
              4. Now,  pour the chocolate mixture into a large mixing bowl and stir in lightly beaten egg and sifted self raising flour. I stir in the flour in 4 batches. After every batch I used a large wooden spoon (you can use any large spoon really) and stir gently to combine. 
              5. Fill the mixture into cupcake cups up to two third (pour from the centre,for dome shape).
              6. Place the baking tray into the oven. Turn down the temperature to 150°C and bake for 10 to 15 minutes or until a skewer inserted into the cake comes out clean. 
              7. Transfer to a wire rack to cool. Repeat with remaining mixture. 
              8. When cool, decorate with chocolate icing and sprinkles.

              TIPS:
              • Difference between fan forced oven and non: 10 - 20°C difference. 
              • If dome doesn't happen, once the mixture settled and flat, swirl with clean teaspoon for dome.
              • Do not have to turn down the tempreture if your cupcake size is larger than 50cents coin shape. 
              • Larger size cupcakes bake for 15 to 20 minutes.
              • Cup cake can be kept about a week in an airtight container


              CHOCOLATE GLAZE ICING

              Here's the interesting FACTS; difference between Icing and Frosting.
              Icing: thinner, glossier, more liquid, icing (confectionary sugar) combine with milk, slip or runs off the cake
              Frosting: thicker in nature, like buttercream, soft, creamier, buttery flavour, can be mounded
              HOWEVER, some people think these two terms can be interchange.

              After much thought I called mine as Glaze (Frosting) Icing, hehehe :)

              Ingredients:
              • 1 cup icing sugar
              • 2 tbsp cocoa powder
              • 80g soft butter, room temperature
              • 1/2 tsp vanilla essence
              • 11/2 tbsp milk, hot

              Method:-
              1. Sift together icing sugar and cocoa powder
              2. Add soft butter and vanilla essence
              3. Pour in hot milk and beat / mix well. If you beat the mixture it will turn out fluffier. You may use wooden spoon or large spoon to beat.
              4. Feel free to spread on you cupcake or pipe in out (I pipe out mine). 

              TIPS:

              • Use sandwich bag or anything similar, fill it up wit glaze icing, cut a smal outlet at the tip of the bag (and squeeze (pipe)  it out. Decorate or draw whatever you like.


              • Why icing sugar and not caster sugar ? Icing sugar not only have finer sugar but it also contains cornstarch(thickener) to hold the icing or frosting together.  If you would like to use caster sugar add some cornstarch in it, it work the same. However, remember do beat till caster sugar resolve. 
              • Icing / frosting can be kept in fridge (air tight container) for a week and in freezer for a month. When you defrost it jus stir it up


              LinkWithin

              Related Posts with Thumbnails